
To view the options to add a form, go to Clients > forms:

In this perspective, you have the option to conveniently include new forms for clients by clicking on the "+ Add Client Form" button, or for their dependents by clicking on the "+ Add Pet Form" button, as demonstrated below:

Once the button to add a form is clicked, the system will prompt for additional details:
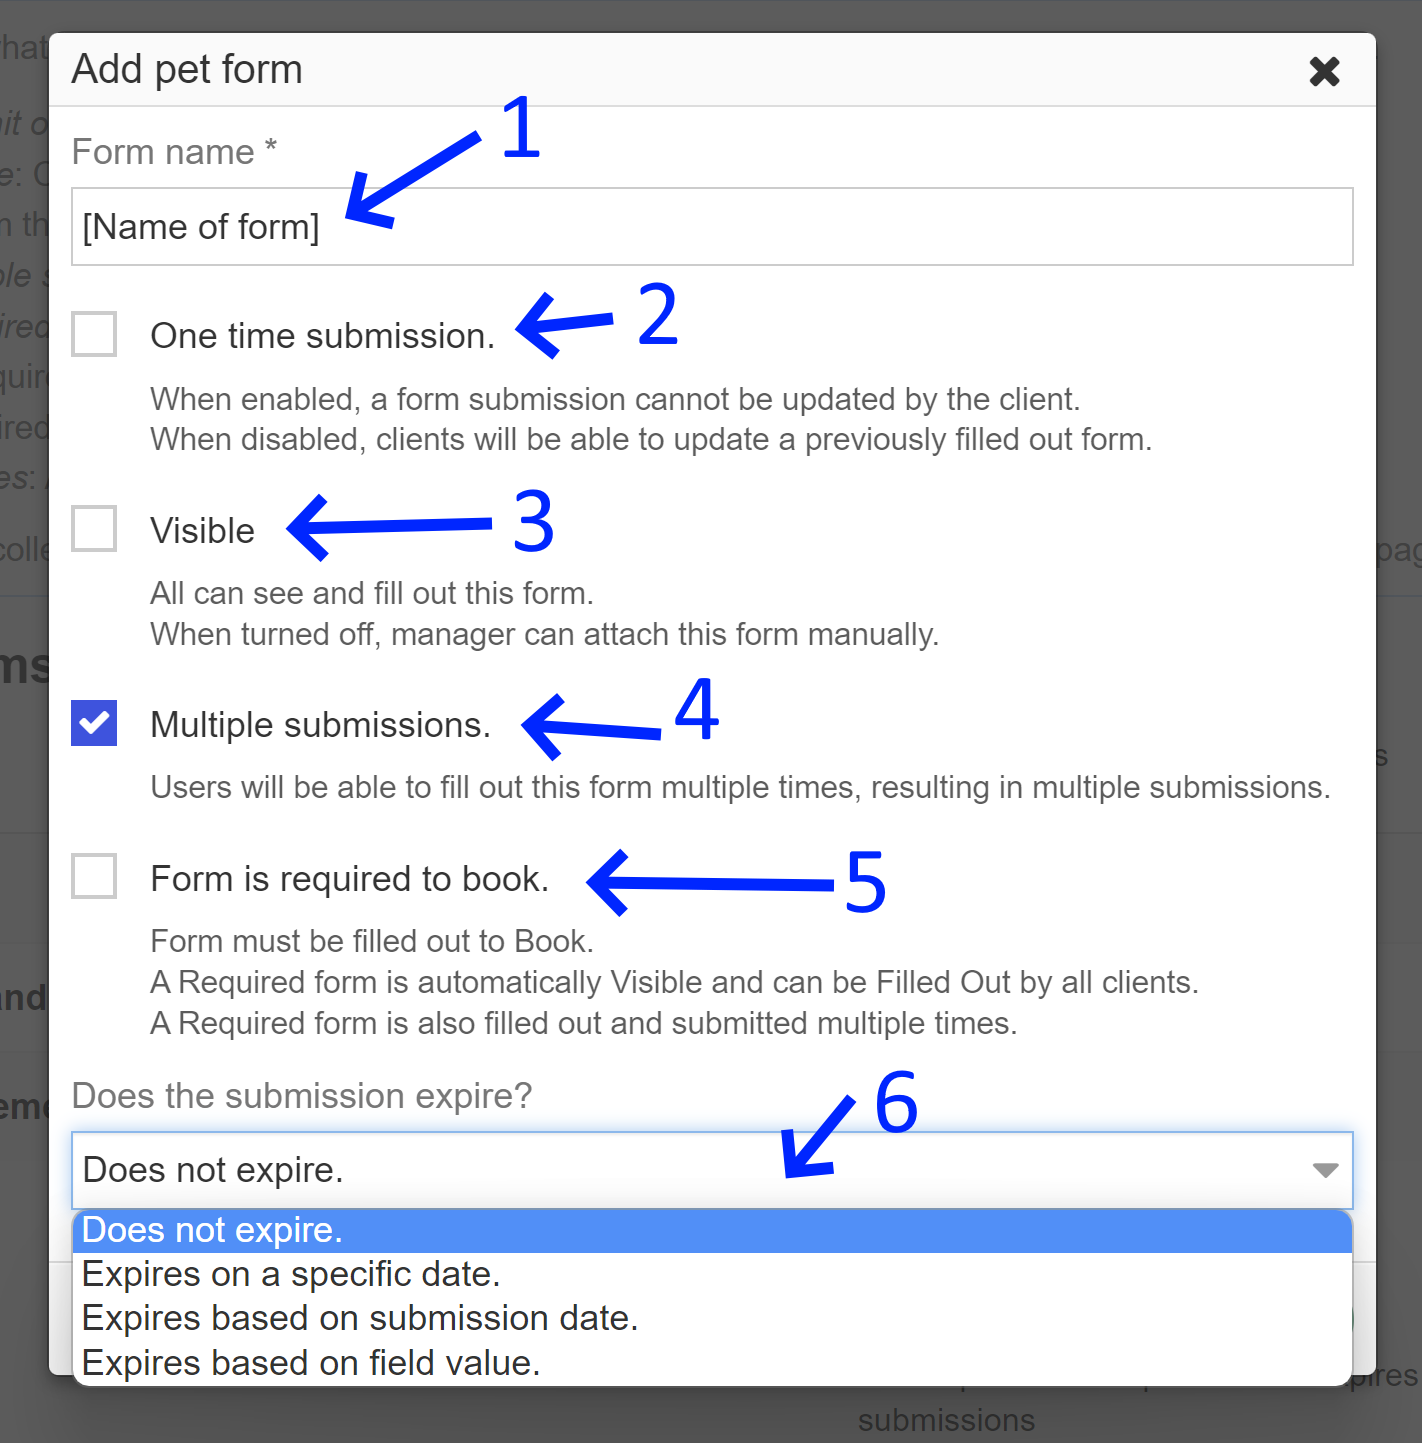
These options serve to define specific "behaviors" associated with the document you are designing:
-
Form Title: This allows you to give a descriptive title to the form, such as "Media Release" or "Rabies Vaccine."
-
One-time Submission: When enabled, clients will not be able to resubmit or update the form after it has been submitted once.
-
Visibility: By marking a form as visible, clients can view and complete it. If a form is not visible to all clients, a manager will need to assign the form to a specific client.
-
Multiple Submissions: This feature stores each submission of the form separately, allowing for multiple instances to be recorded.
-
Required Forms: Clients must submit required forms in order to proceed with booking.
-
Form Expiry: Form submissions can be set to expire based on a specific date, a designated time duration after submission, or a specific date field within the form. For more information on how to establish a rabies vaccine, please refer to our article on the expiry feature.
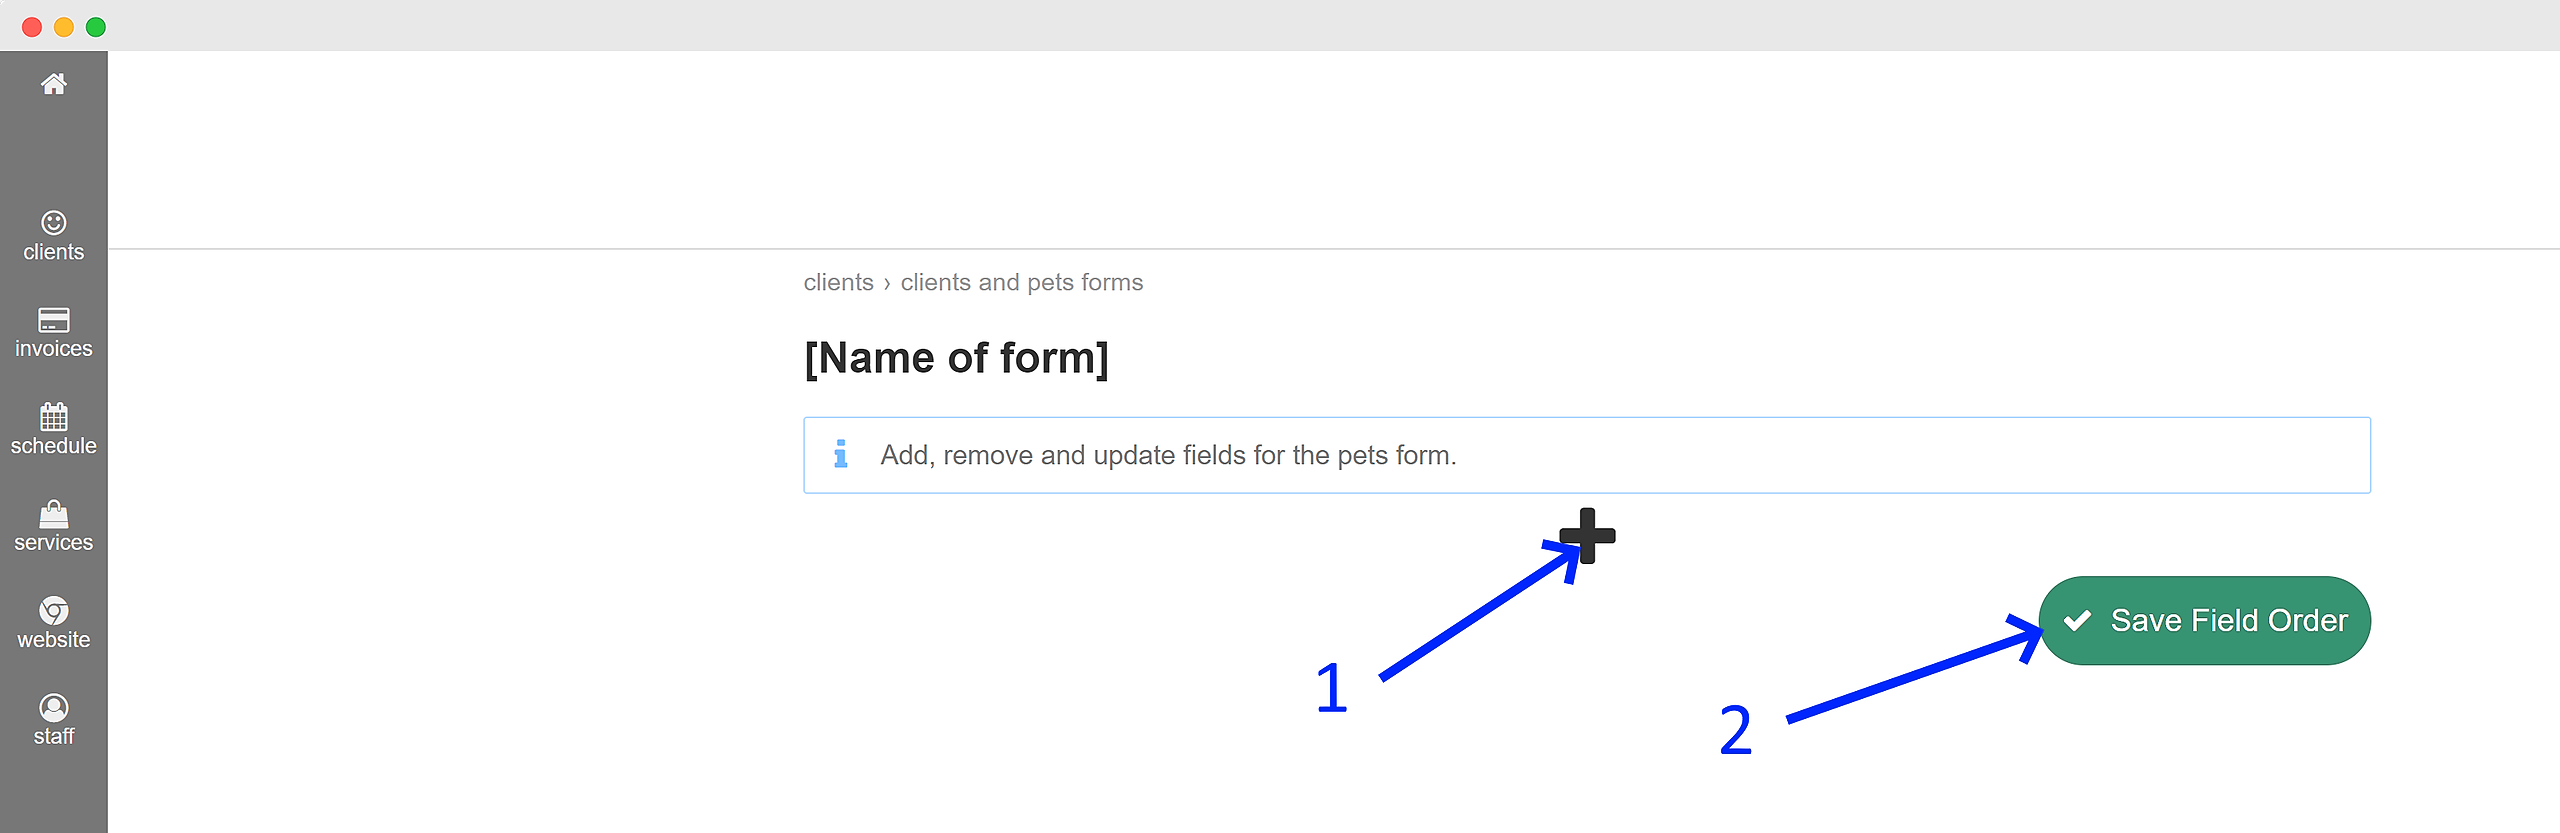
The subsequent window will display the form fields that need to be filled out to create your form:
-
Simply click on the "+" symbol to effortlessly add new custom fields to your form.
-
After you have added all the desired custom fields, save the form to navigate back to the main list screen of your forms.

Your newly created form will now be categorized and listed under either the "Pet Forms" or "Client Forms" section.
Learn more from our walk-through video: