Before reading ahead, it would be good to familiarize yourself with the workings of our services if you haven't done so, particularly the process of adding a category and introducing new services. Although the subsequent steps may bear similarities, our primary focus in this discussion lies in exploring how you can add products into the system.
If you have already added products and are looking to include variants, we have a helpful sister article that specifically covers how to add product variants.
As a manager, log in to your account and view all your services, a listing which also includes all your products. You have the flexibility to group your products in a way that suits your needs. For instance, if you sell drinks, you can create a category called "Soft Drinks" to gather all your soda products together. This allows for easy organization and efficient management of your inventory.
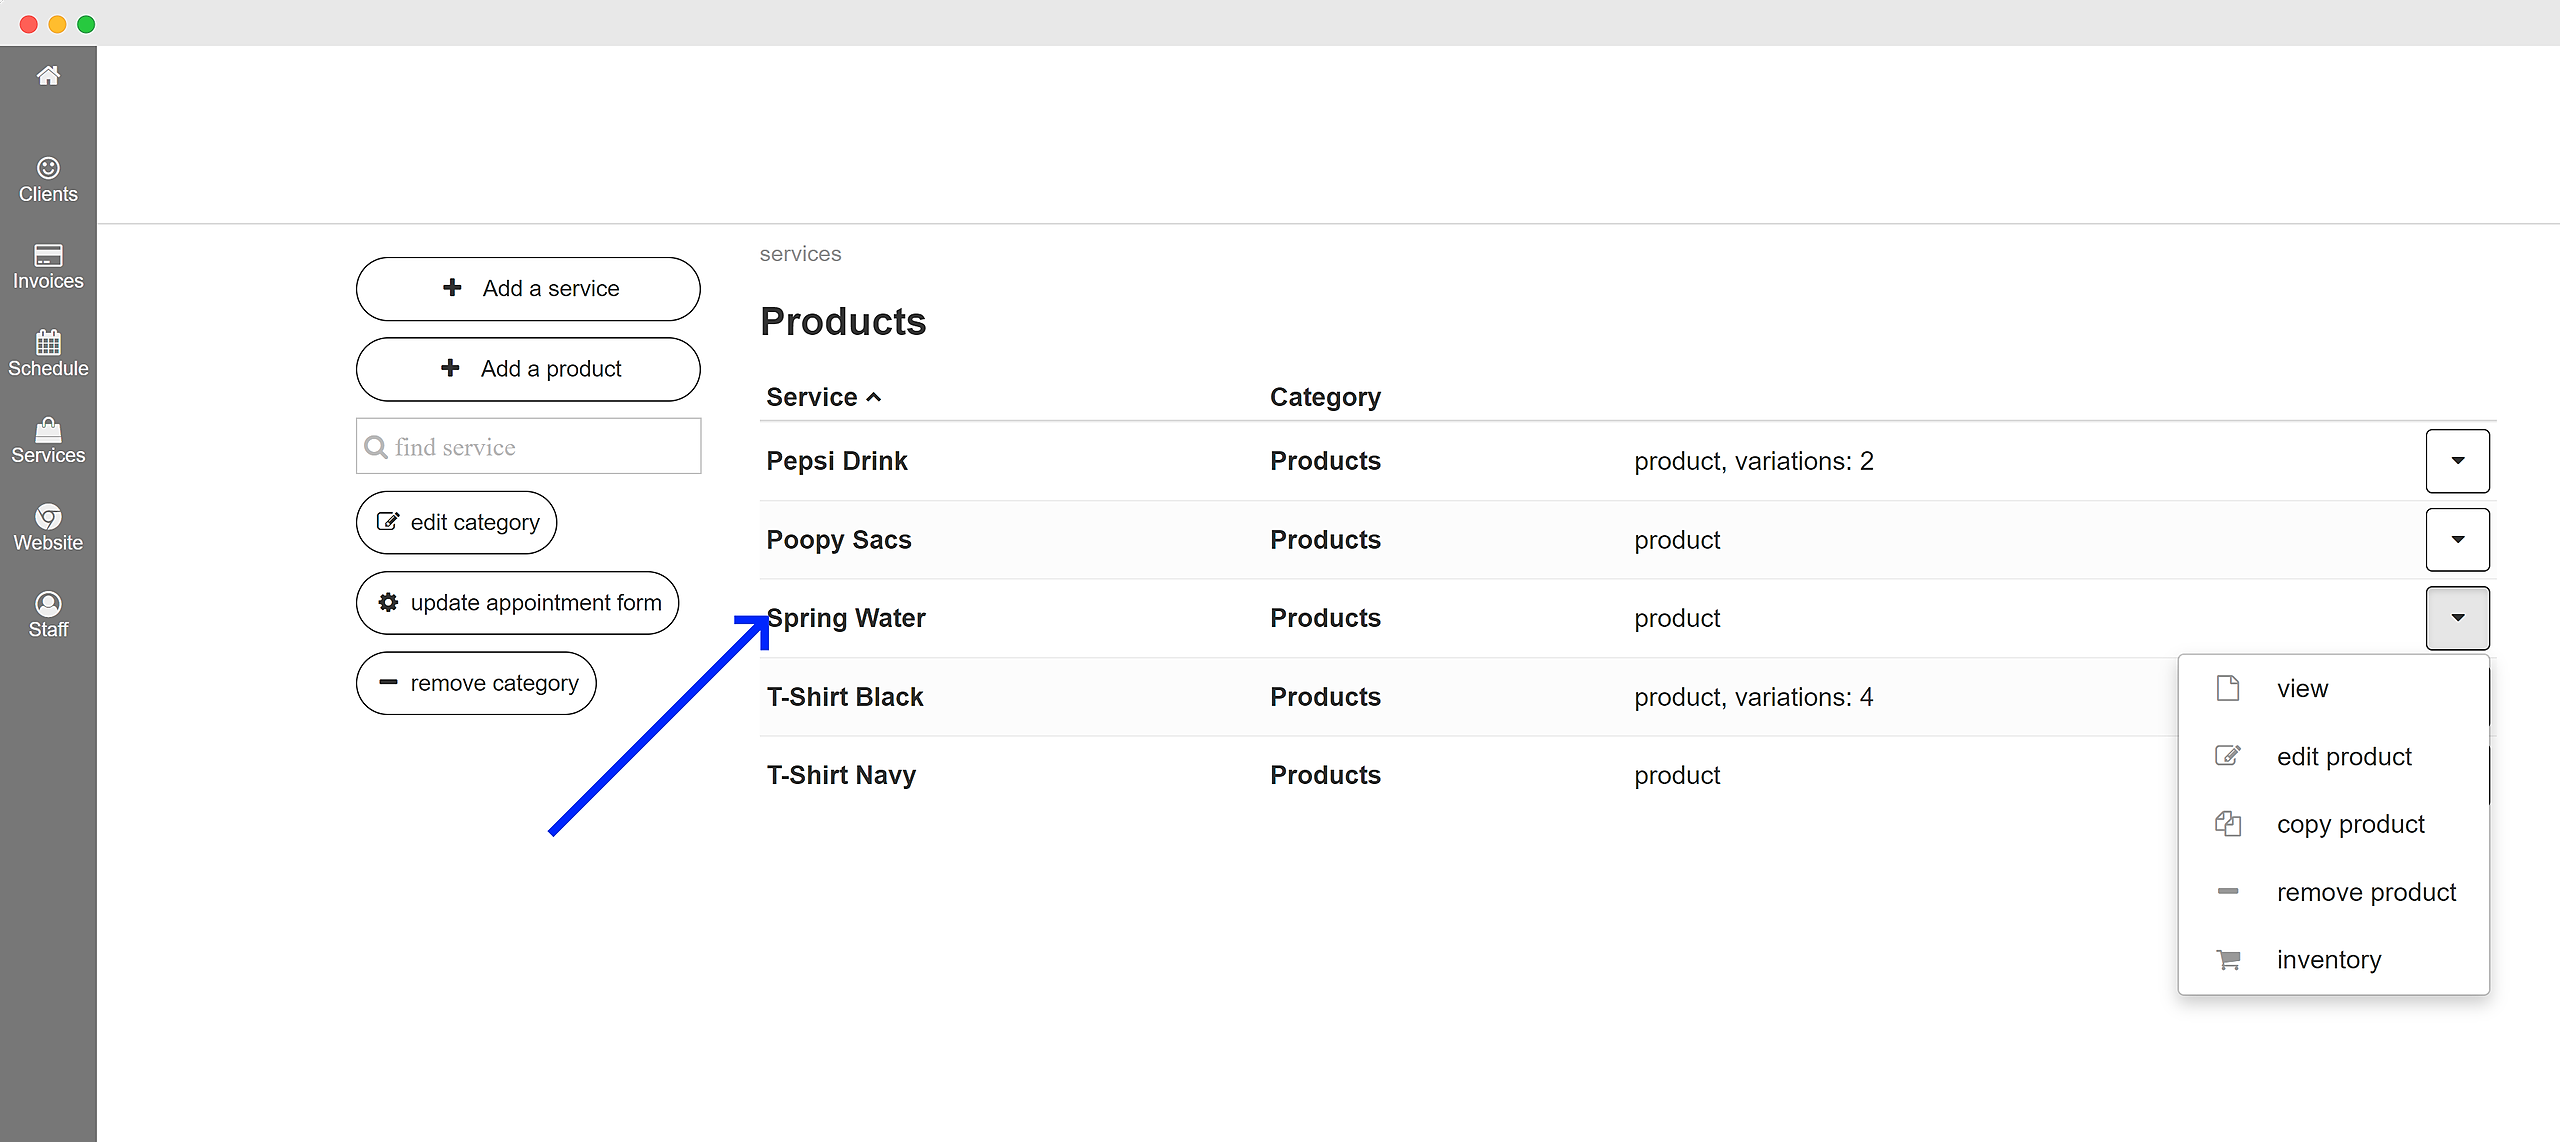
Below is an example of how your list of products can be displayed under a specific category. The category is labeled "Products", and the main window already displays previously created products for the purpose of demonstration.
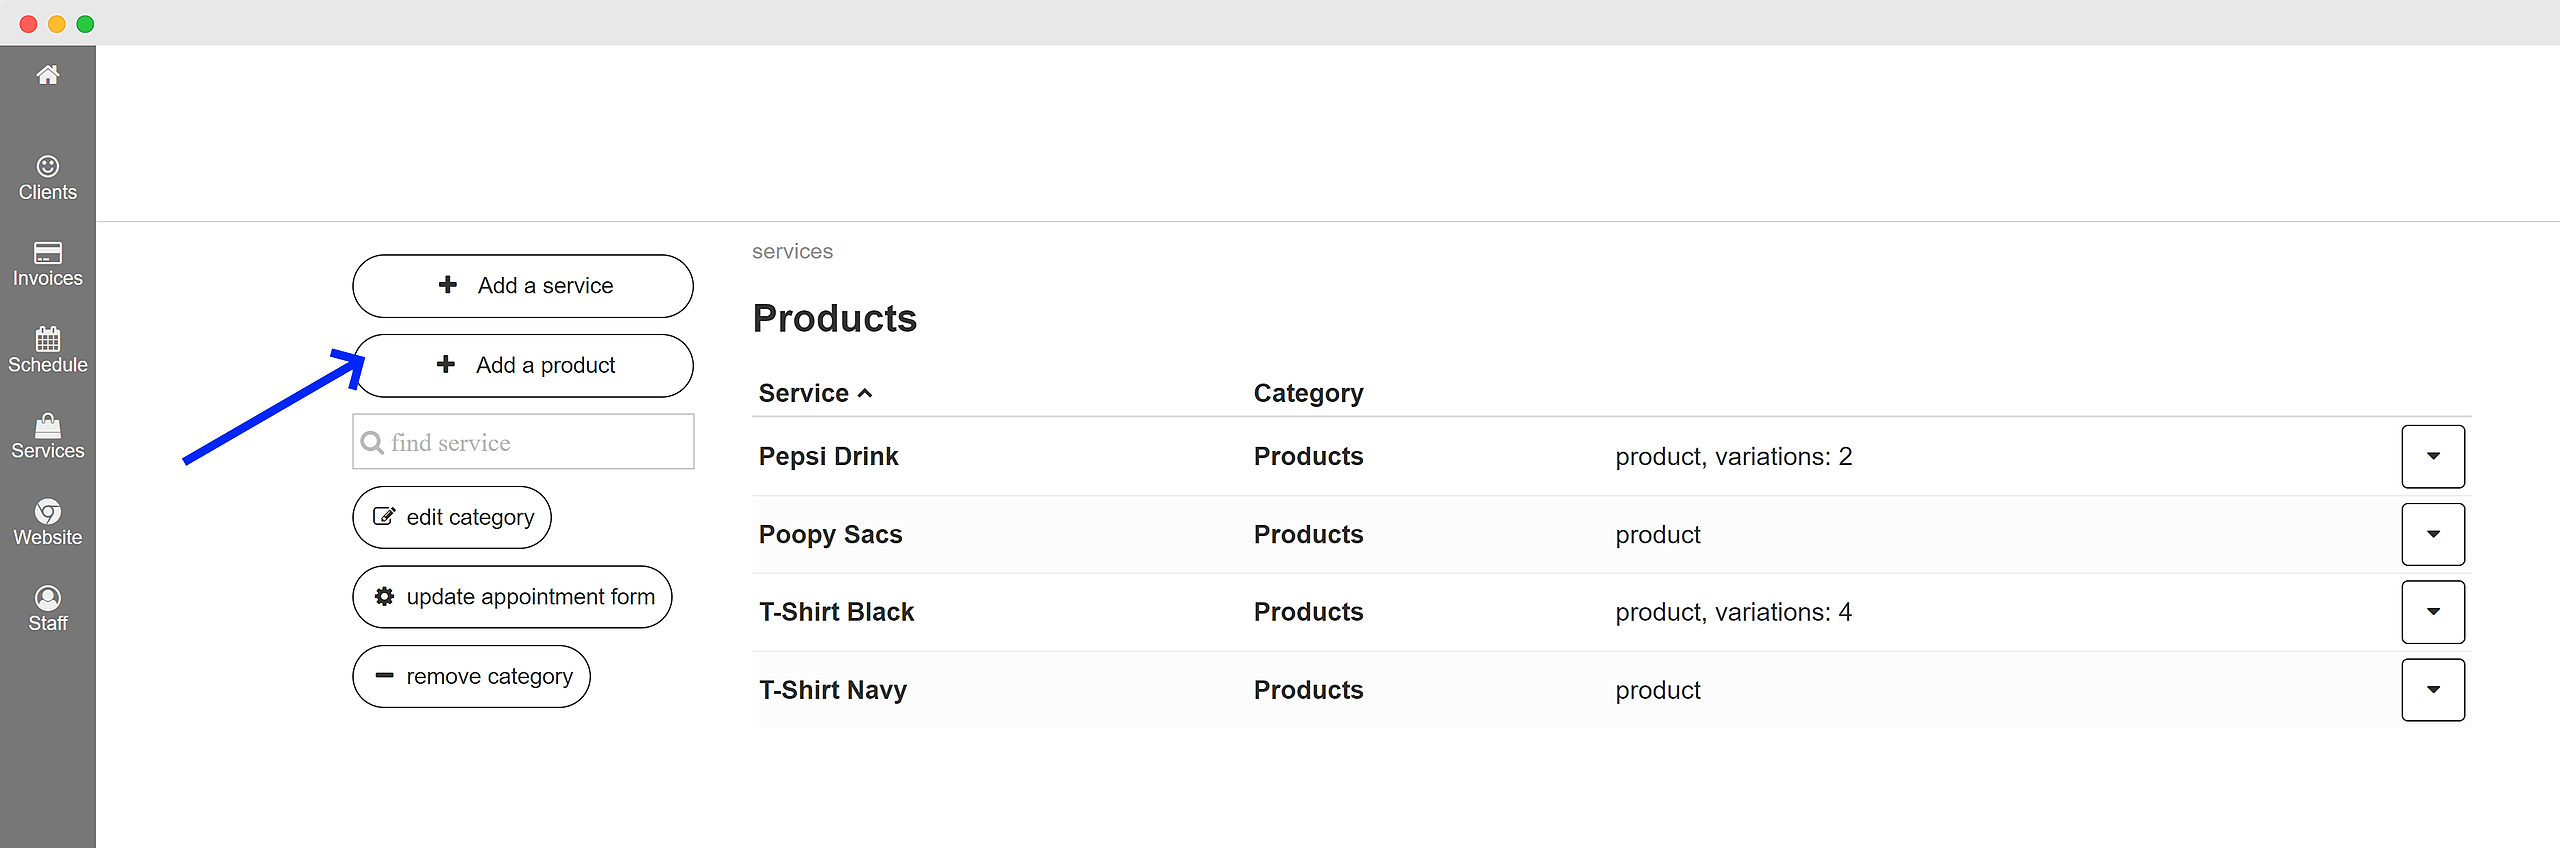
Click on "+ Add a product."
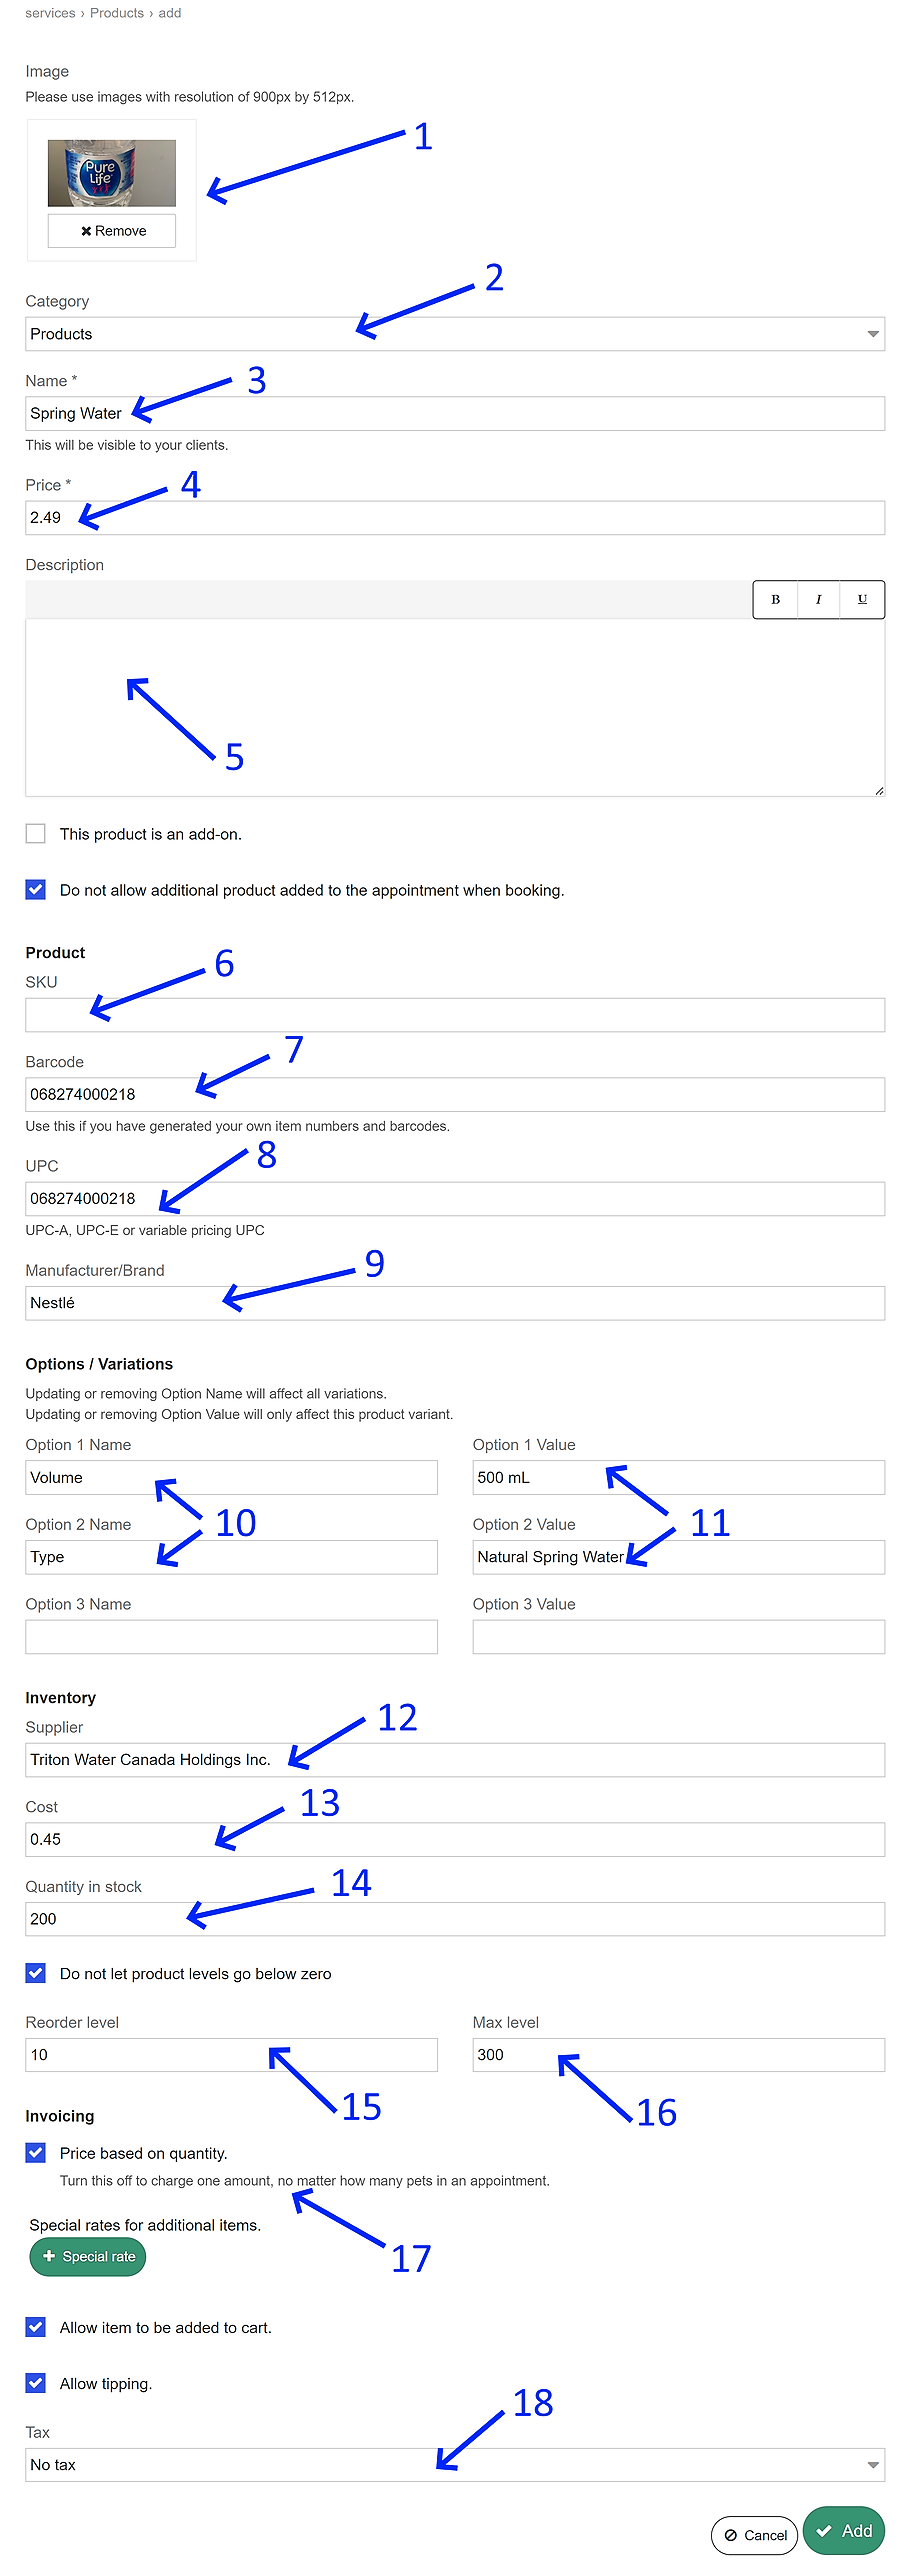
Below is the window you will see to start adding the attributes of a new product into your system. We use a water bottle as an example:
-
Please upload a picture of the product. This image will be set as the default representation for this product, in case you decide to create additional variations of it.
-
Category: Products are organized into specific categories. For this example, the product will be placed in a category named "Products."
-
Name: Here is where you can provide a name for your new product.
-
Price: Enter the amount you plan to charge your clients when they purchase this product.
-
Description: Providing a detailed description of your product helps your employees effectively communicate its features to customers in-store. Additionally, it can be used as content on your website if you have a webpage dedicated to showcasing and selling your products online.
-
SKU (Stock Keeping Unit): Each product is assigned a unique identifier known as an SKU. This helps you track inventory and sales for specific items or variations. SKUs typically differentiate products based on factors like size, color, style, or other attributes. The SKU serves as a reference code that enables your business to identify and locate products within your internal inventory system. It is unique to your business and not defined externally.
-
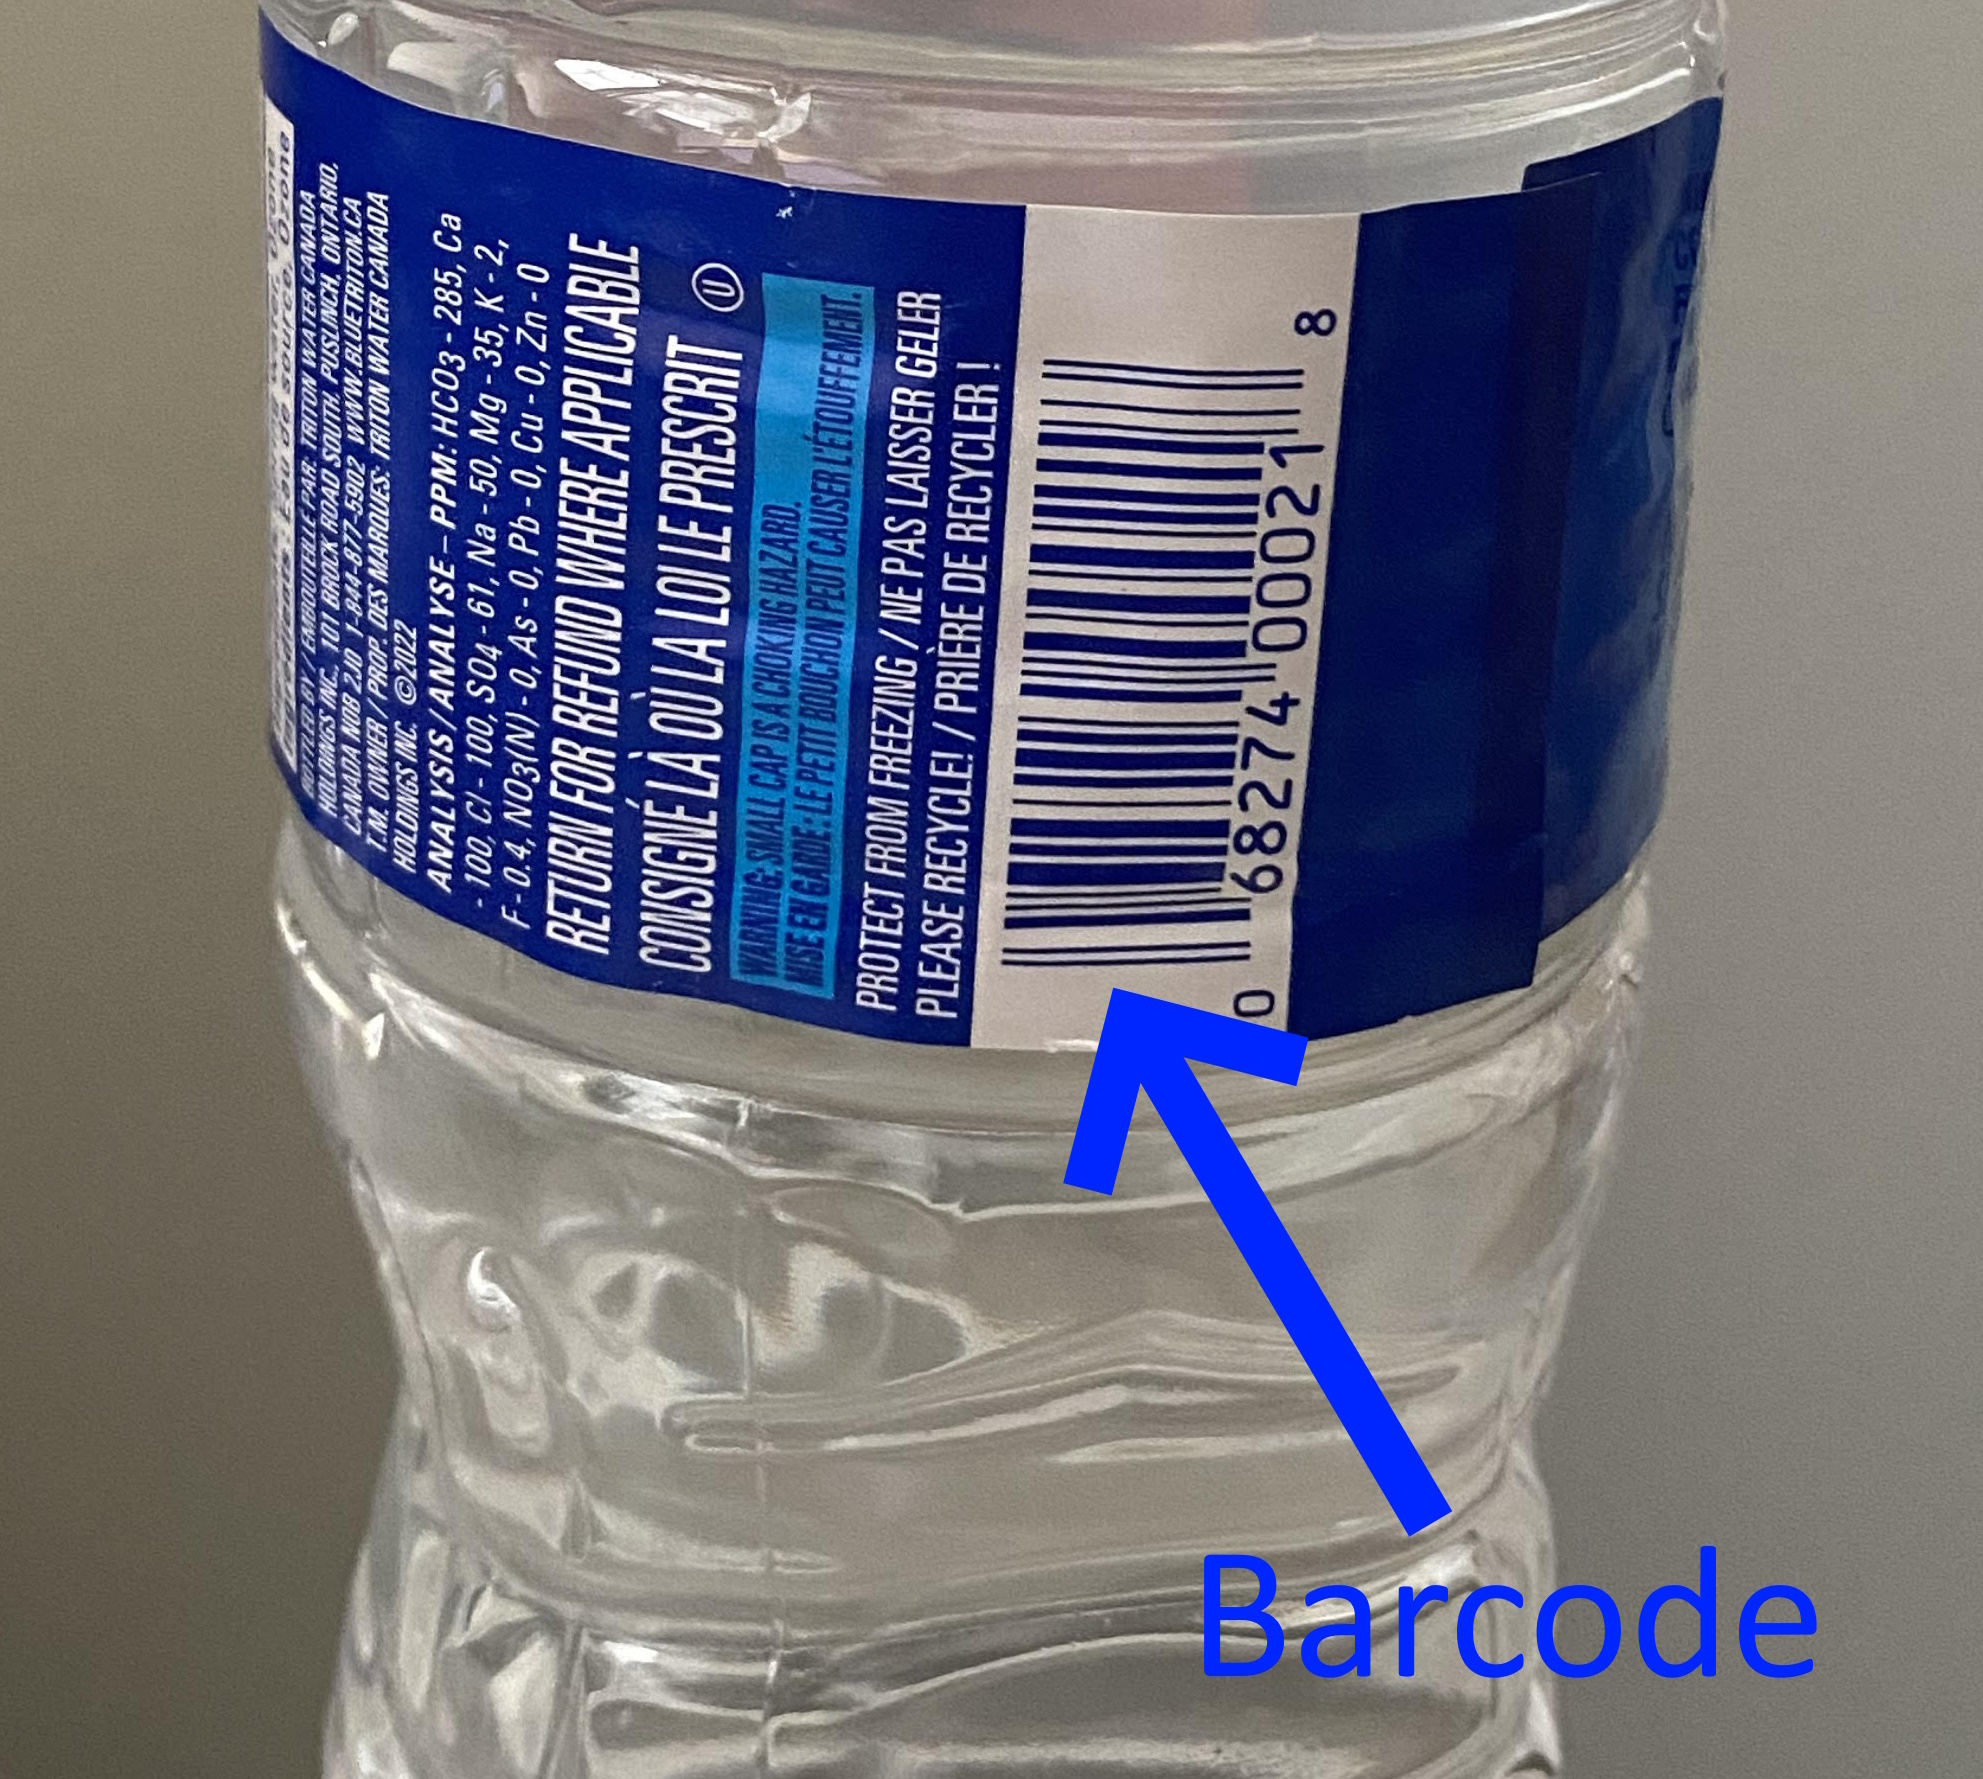
A barcode is a visual representation of data, such as the familiar black and white lines or squares found on product packaging (illustrated below). To input the barcode, please ensure your cursor is in the barcode text box and then use your barcode scanner to scan the product as demonstrated below. Alternatively, you can manually enter the barcode if needed.
-
The Universal Product Code (UPC) is a widely used barcode system in the retail industry for efficient product scanning and tracking. It consists of a standardized 12-digit numeric code that manufacturers assign to each product and print on the product label. This unique code helps identify the item or product variant during the point of sale. The management of UPCs is handled by the Uniform Code Council (UCC) and its successor, GS1 (Global Standards One).
-
This field allows you to enter the manufacturer of the product for record keeping purposes and to facilitate various reporting activities.
-
Products can have various variations. For example, clothing can differ in size, while beverages can have different flavors or volumes. When creating the default product, you must also define its initial variant.
-
In this section, you define the values associated with the first variant of the product. Once you have created the default product, you can add more variants and specify the corresponding changes to these values. For example, you can differentiate between a 1 liter and a 500 mL bottle of Coca-Cola.
-
Here, you enter the name of the supplier for this product. Once the product is created, you can add additional suppliers as needed.
-
Product cost refers to the price at which each supplier agrees to provide the product to you. Whenever you add inventory, you need to document this cost.
-
Product quantity represents the number of additional products you are adding to your inventory. It is used to indicate a non-zero quantity of the purchased product from the respective supplier.
-
The reorder level is a threshold that, when crossed due to a decrease in inventory caused by customer purchases, triggers the creation of a new purchase order to the supplier.
-
This field determines the maximum amount specified in an automatically created and sent purchase order.
-
The option to price by quantity is typically enabled, allowing for potential discounts when a client purchases additional products.
-
The applicability of tax depends on the state in which you reside and may not be applicable in certain cases.
The newly added product has been successfully included in the category, as depicted in the following illustration: