
Before proceeding, it is essential to ensure that you have added a form. If you haven't done so yet, now is the ideal time to catch up on this crucial step. Designing your forms according to your preferences will be the next exciting phase.
When you edit your form, you will be presented with an option to add custom fields as illustrated below.
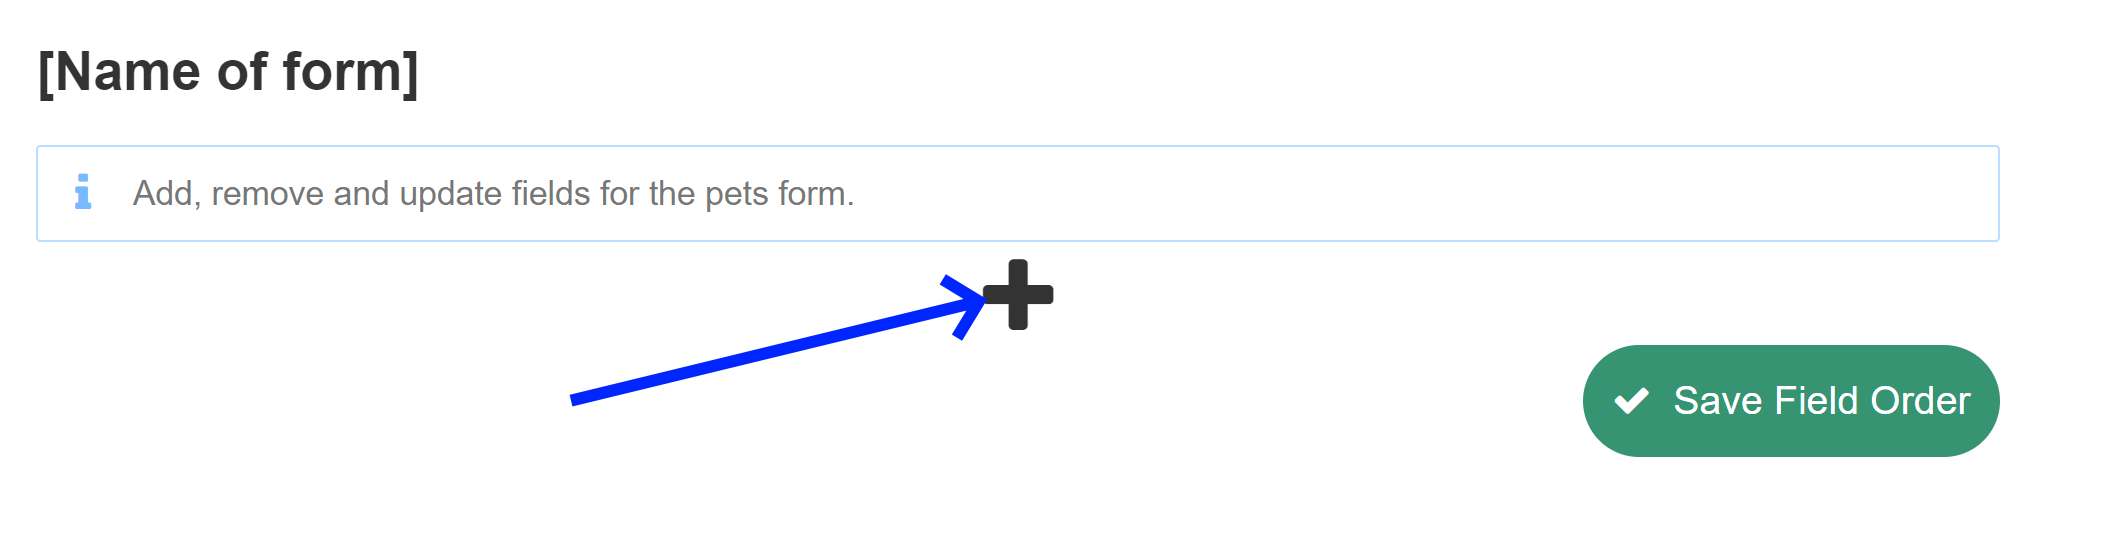
You have a diverse selection of 12 options to choose from currently:
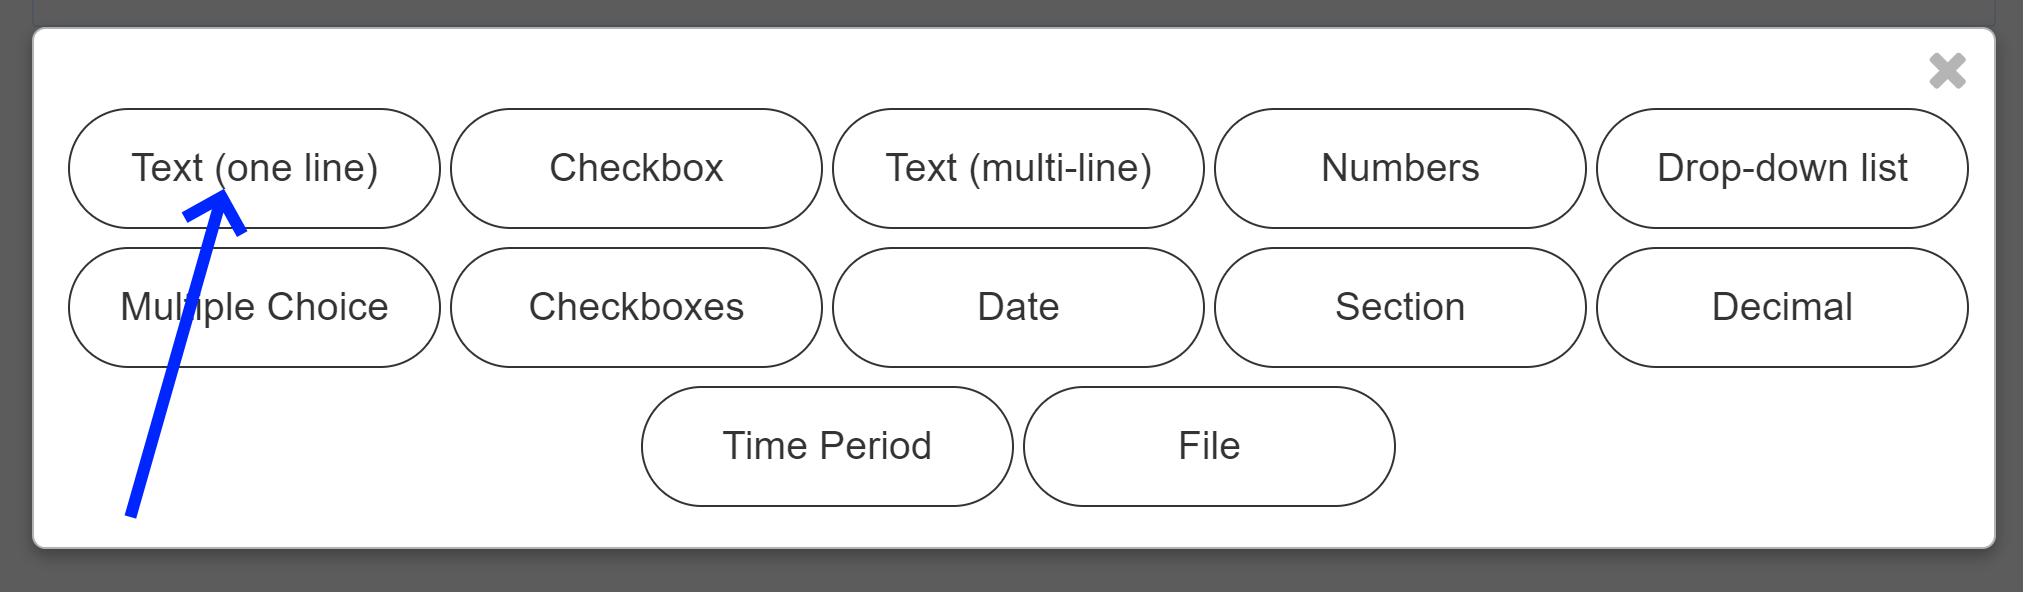
To provide a clearer visualization of their unique applications, we have gone ahead and sequentially added all 12 distinct custom fields for your reference below:
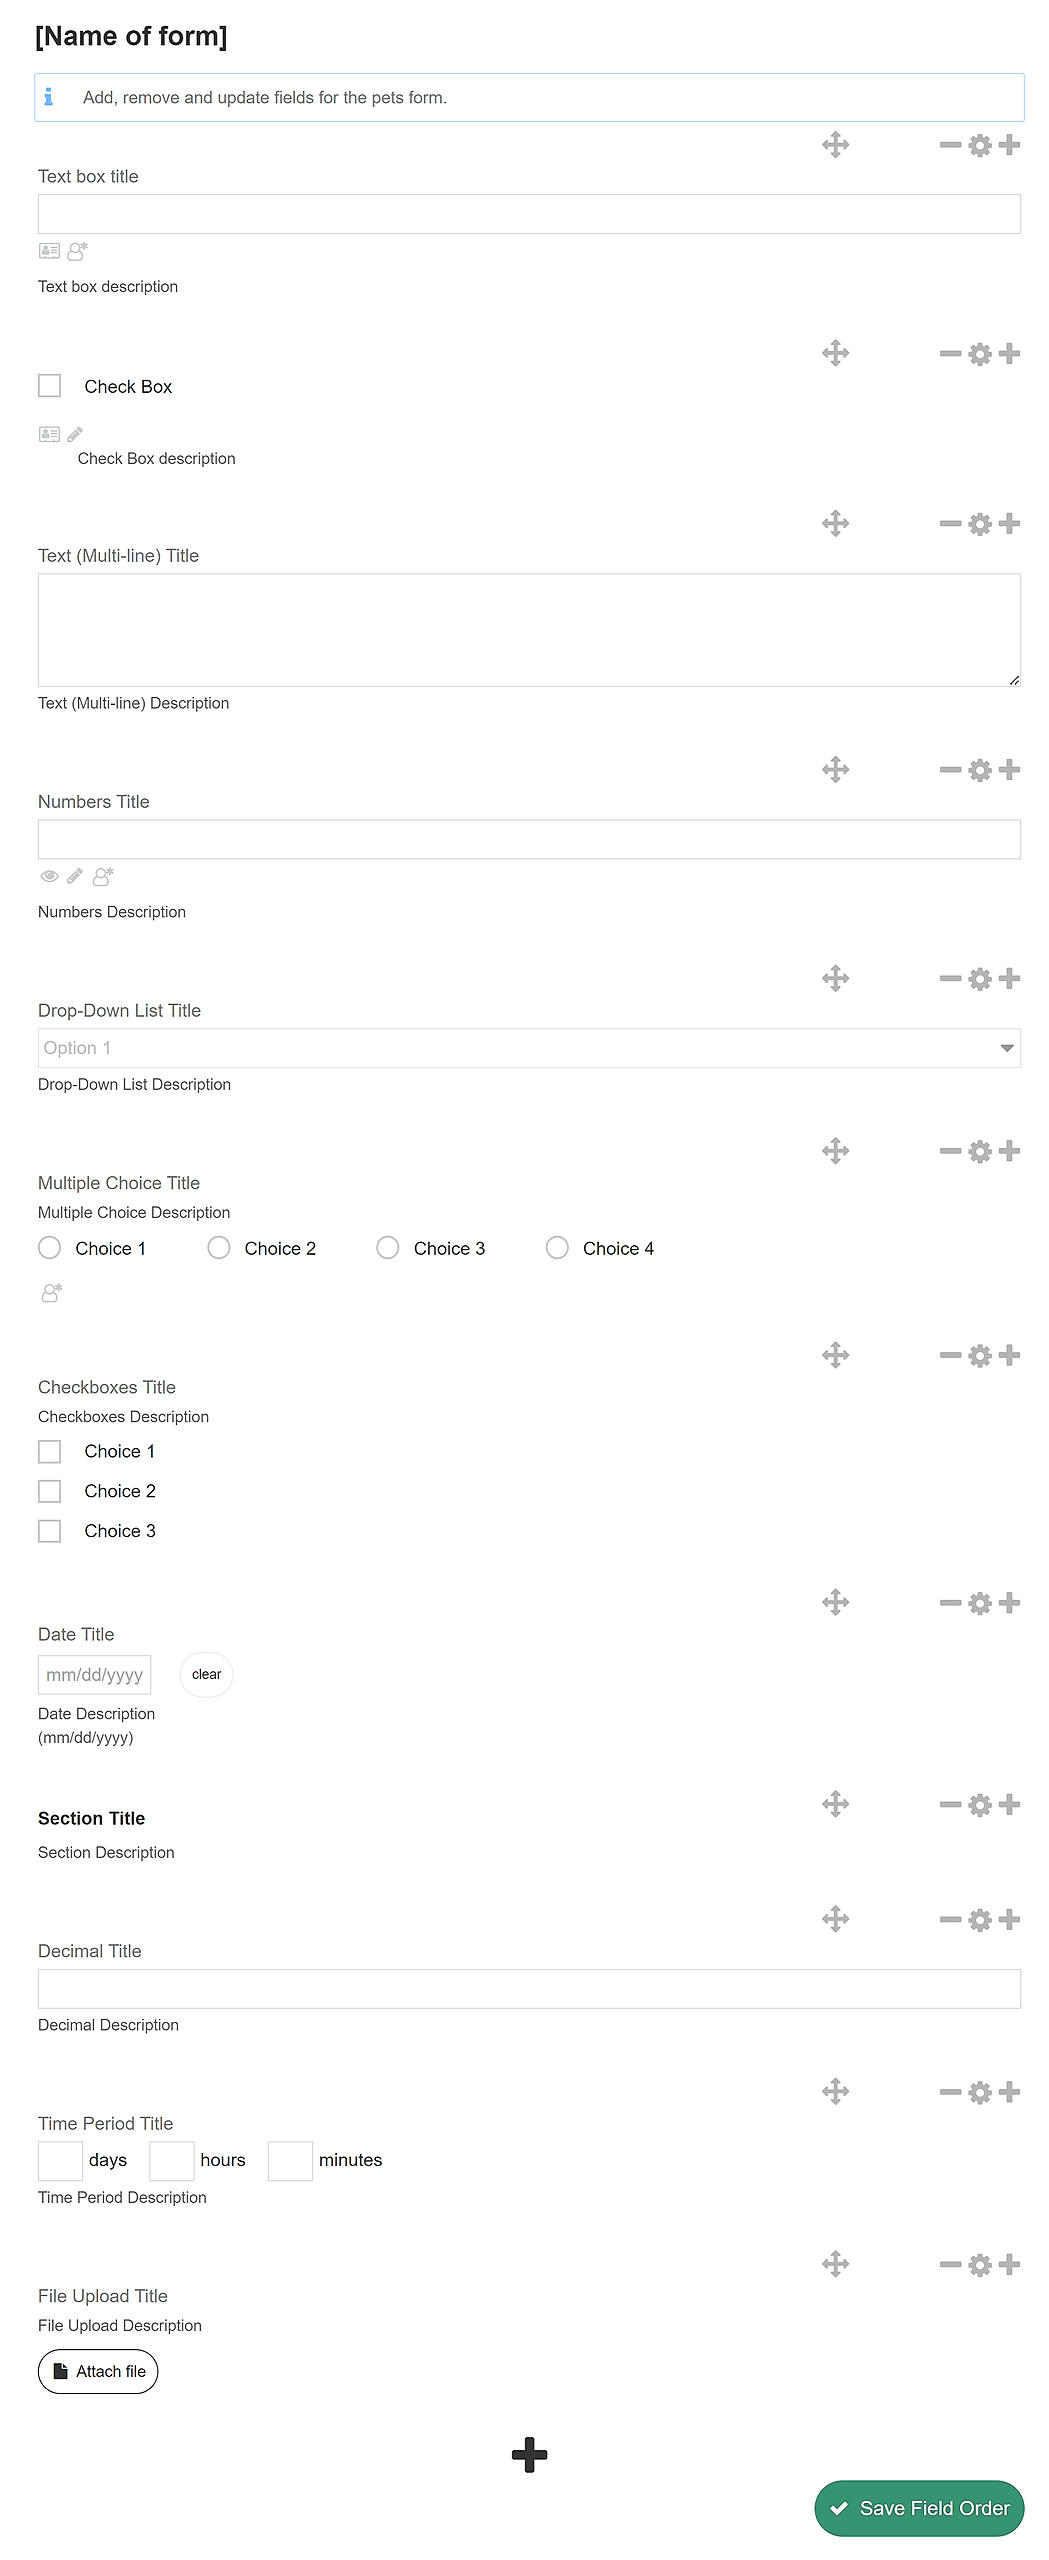
Custom Field Configuration
Each custom field has four options:

-
Move: Easily adjust the position of any custom field by left-clicking and dragging it up or down. This allows you to relocate the field to the desired location within the form.
-
Delete: Exercise caution when deleting a custom field, as it will also remove all corresponding historic entries associated with that field from the forms of clients or pets. Please consider this before proceeding.
-
Edit: Explore the option to modify the settings and properties of a specific custom field. More details about the editing process will be provided below.
-
Add: Expand your form's customization capabilities by adding a new custom field. Upon selection, a prompt will present the 12 custom field options described earlier, and your chosen field will be instantly added below the current custom field.
These options empower you to tailor your form precisely according to your needs and preferences, ensuring a seamless and efficient data collection process.
Edit Custom Field
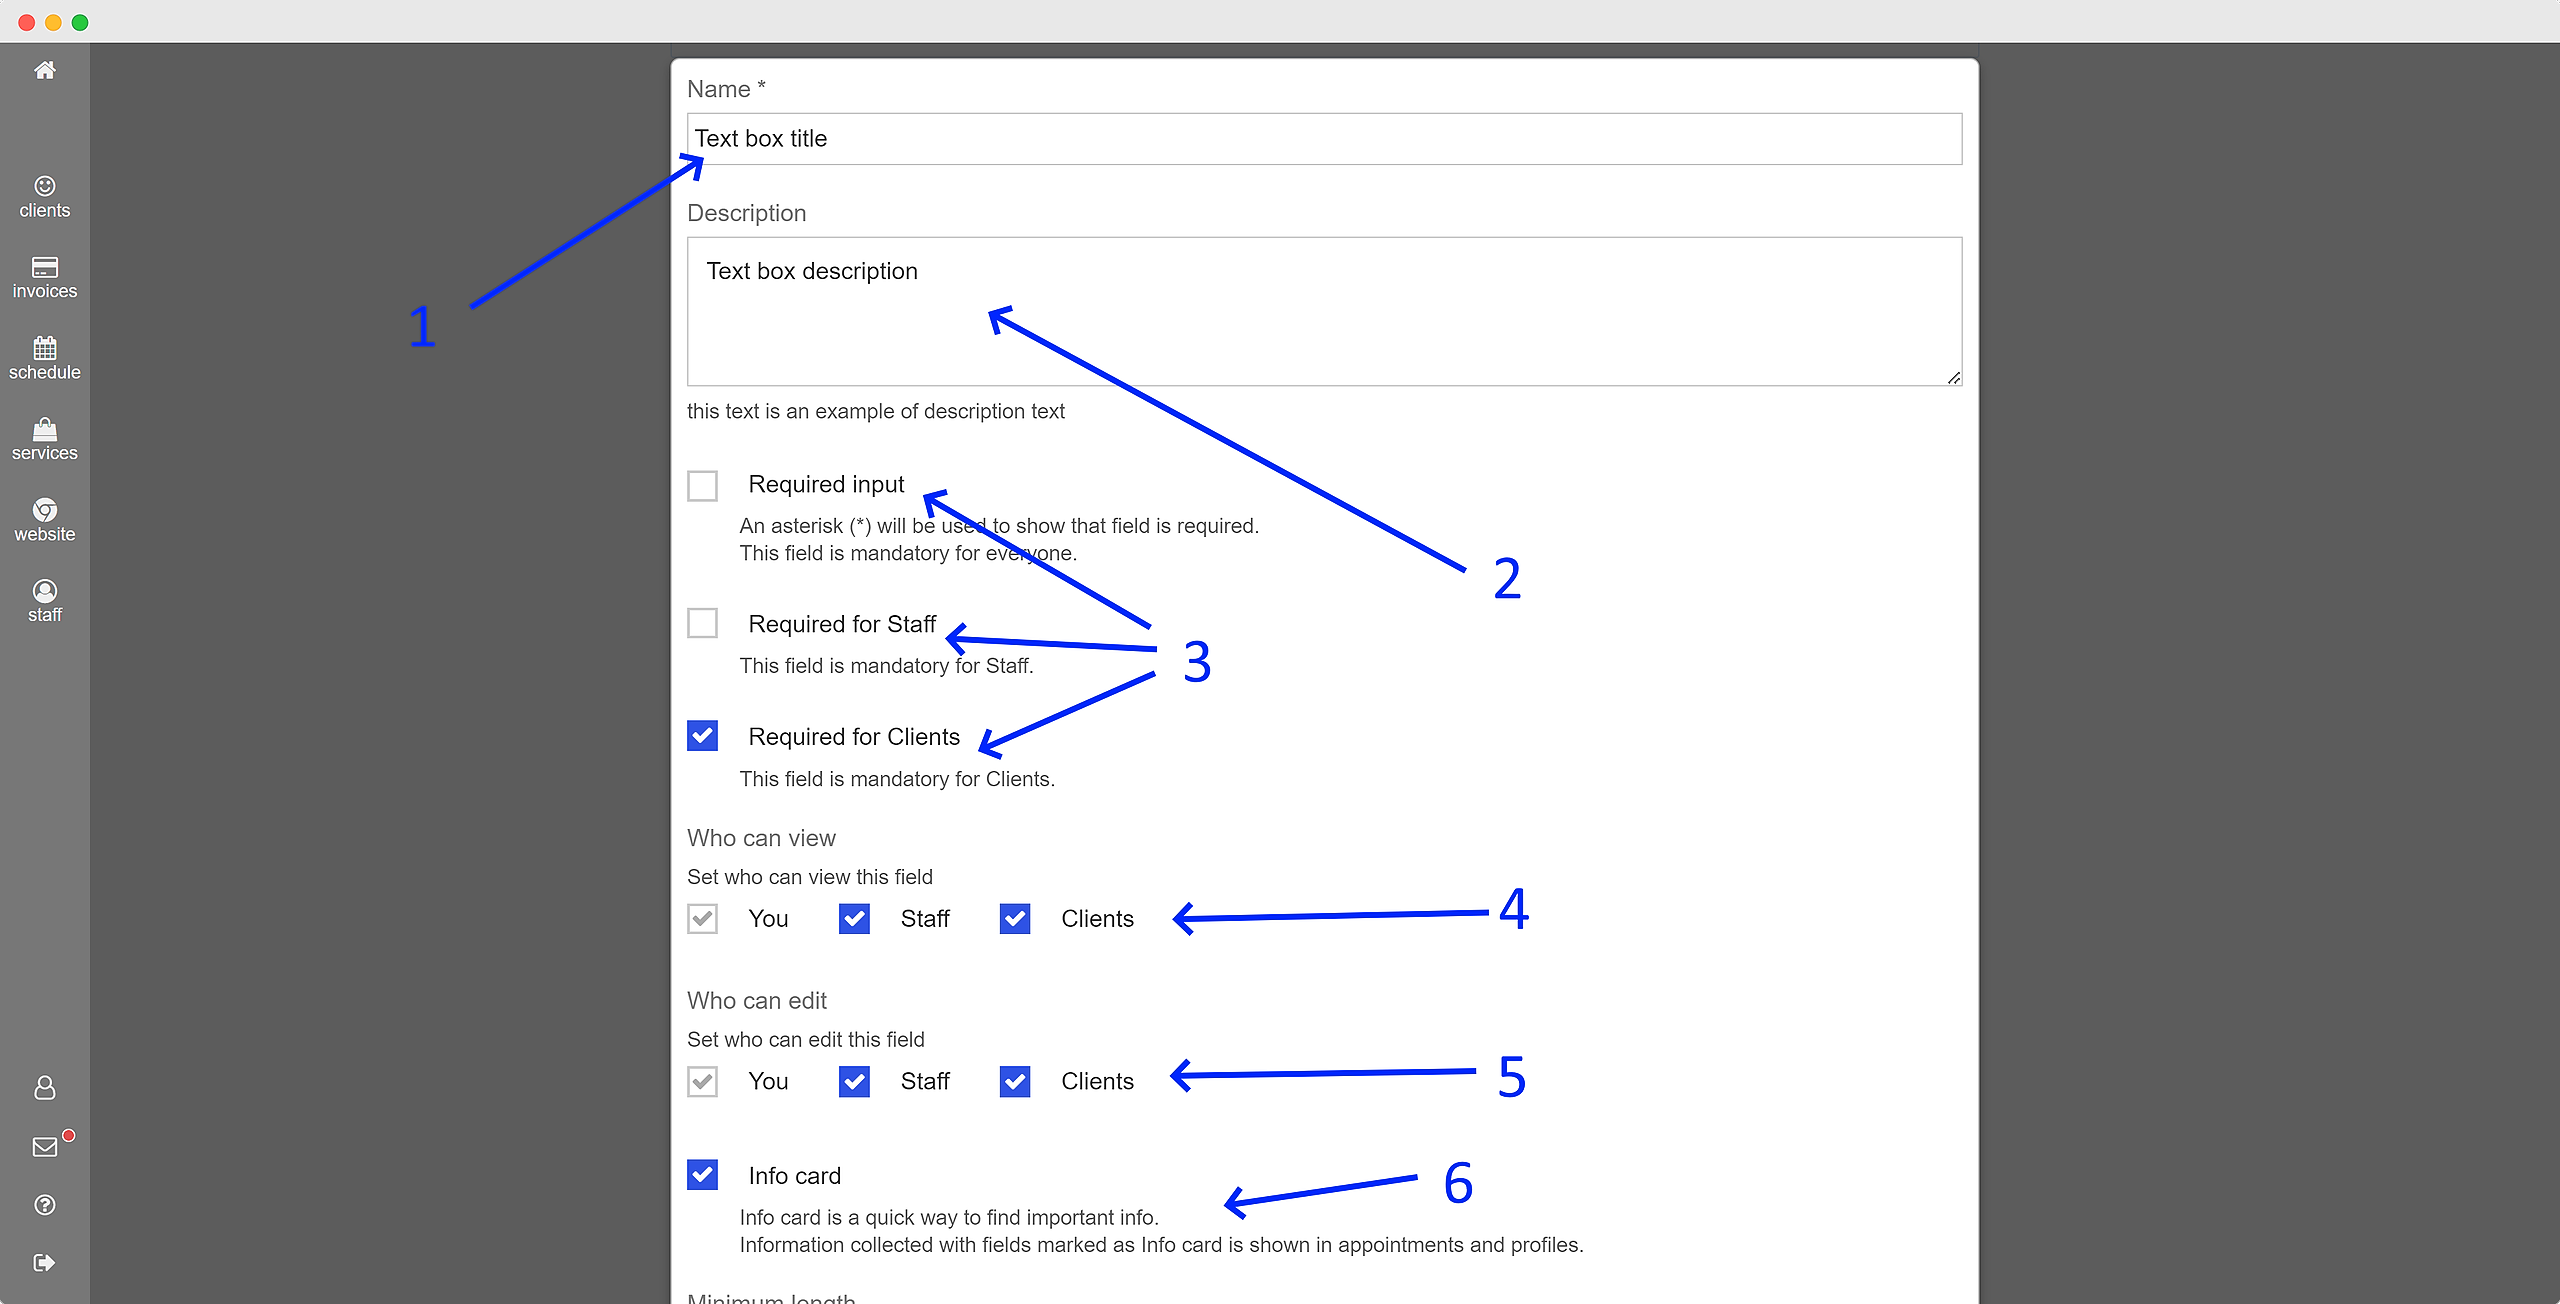
When you edit a custom field, the options are divided into two parts: General and Specialized.
General Custom Field Settings: All custom fields have the general settings listed below.
-
Title: Provide a descriptive title for the custom field to help identify its purpose within the form.
-
Description: Include a brief explanation or instructions related to the custom field to provide additional context or guidance to the users.
-
Required Input: Determine whether filling out this custom field is mandatory. By checking the required setting, users, including management, staff, or clients, will be prompted to provide input for this field.
-
Who Can View: Specify which users can view this custom field. You can enable access for specific users such as management, staff, or clients, based on their role or permissions.
-
Who Can Edit: Choose which users have the ability to edit this custom field. You can grant editing privileges to management, staff, or clients, depending on their respective roles and permissions.
-
Info Card: Utilize the Info Card setting to access essential information at a glance. By marking specific fields as Info Card fields, client and pet details from those fields will be automatically displayed in profiles and appointments. Any field within the custom form can be transformed into an Info Card field by updating the form and editing the desired field.
These settings provide flexibility and control over the visibility, editability, and utilization of custom fields within your forms, ensuring an optimized and personalized experience for users.
Specialized Custom Field: All custom fields have the specialized settings, always listed below the general settings.
Here are some examples:
Multiple Choice Custom Field
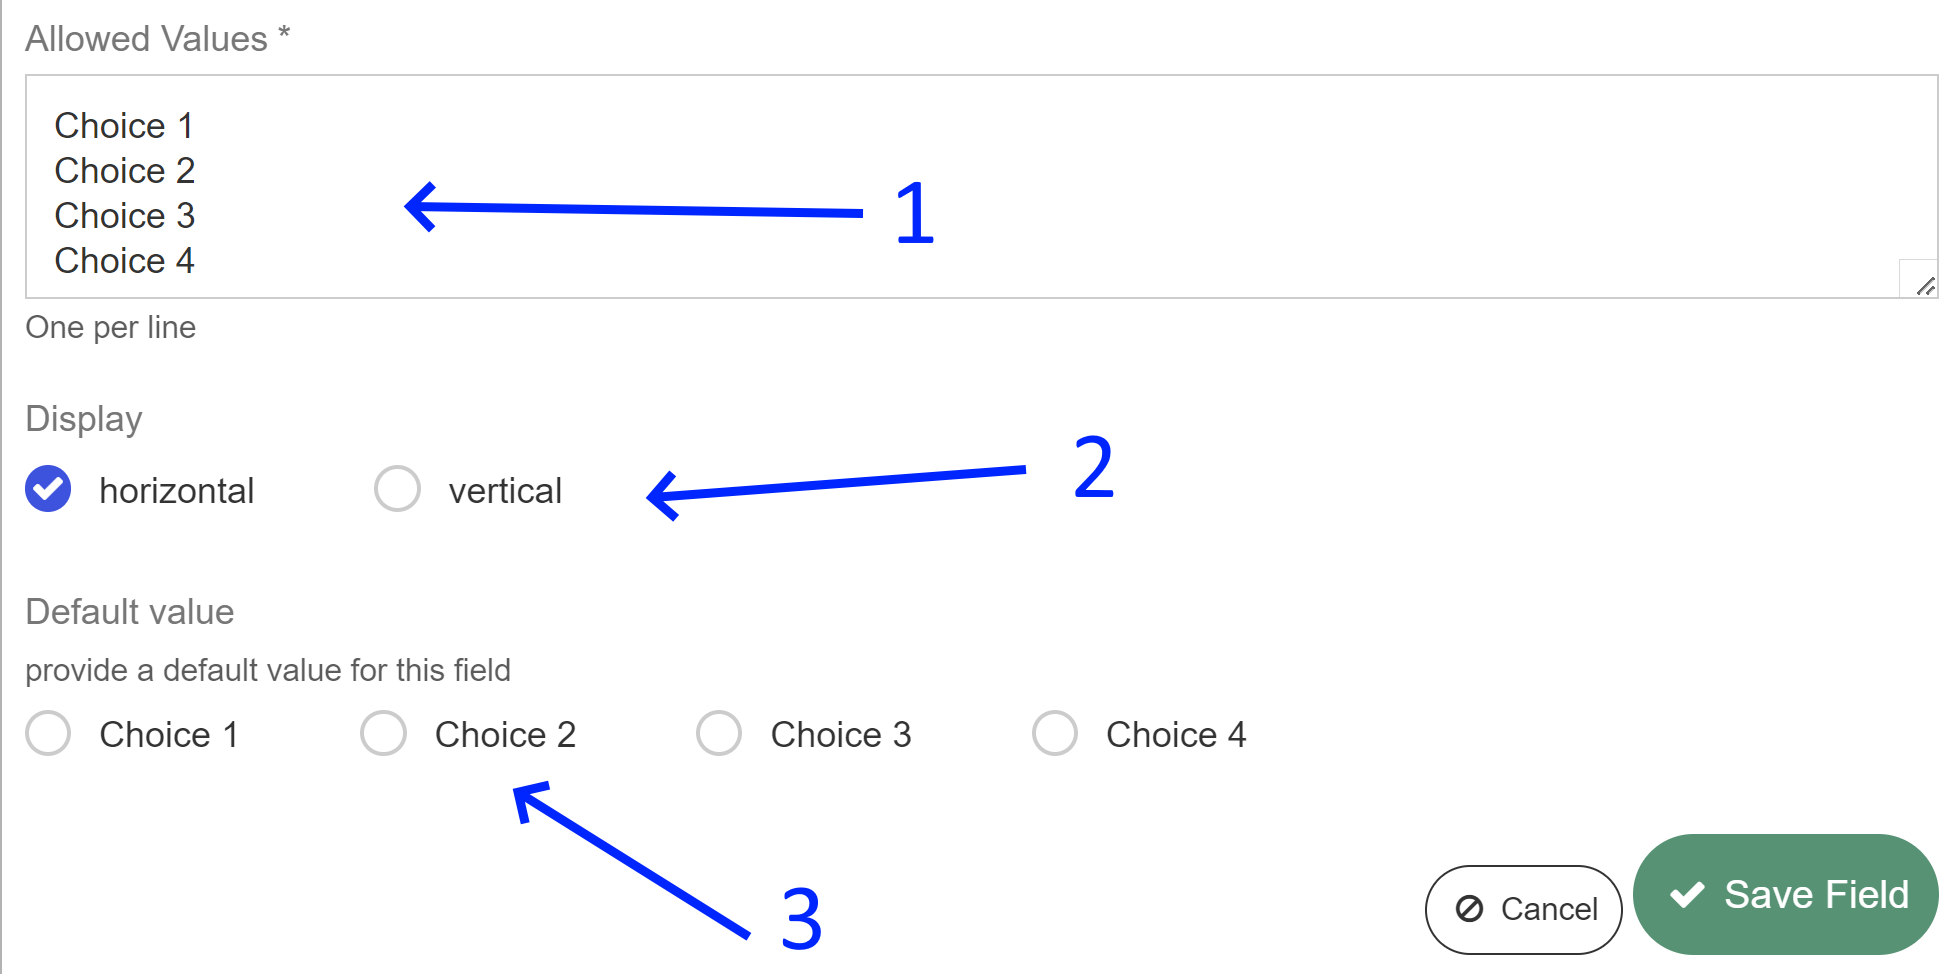
-
Choices: Specify the available choices that users can select from within the multiple choice custom field. Clearly define and list the options that users can choose, allowing them to make a selection based on their preference or requirement.
-
Display Option: Decide how the multiple choice options will be presented to users. You have the flexibility to choose whether the options are displayed horizontally or vertically, depending on your preferred layout or the visual aesthetics of the form.
-
Default Value: Set a default value for the multiple choice custom field. This means that users will have a preselected option already chosen for them if they do not make a specific selection from the available choices. The default value serves as an accepted option if the user does not actively choose one of the other available options.
File Upload Custom Field
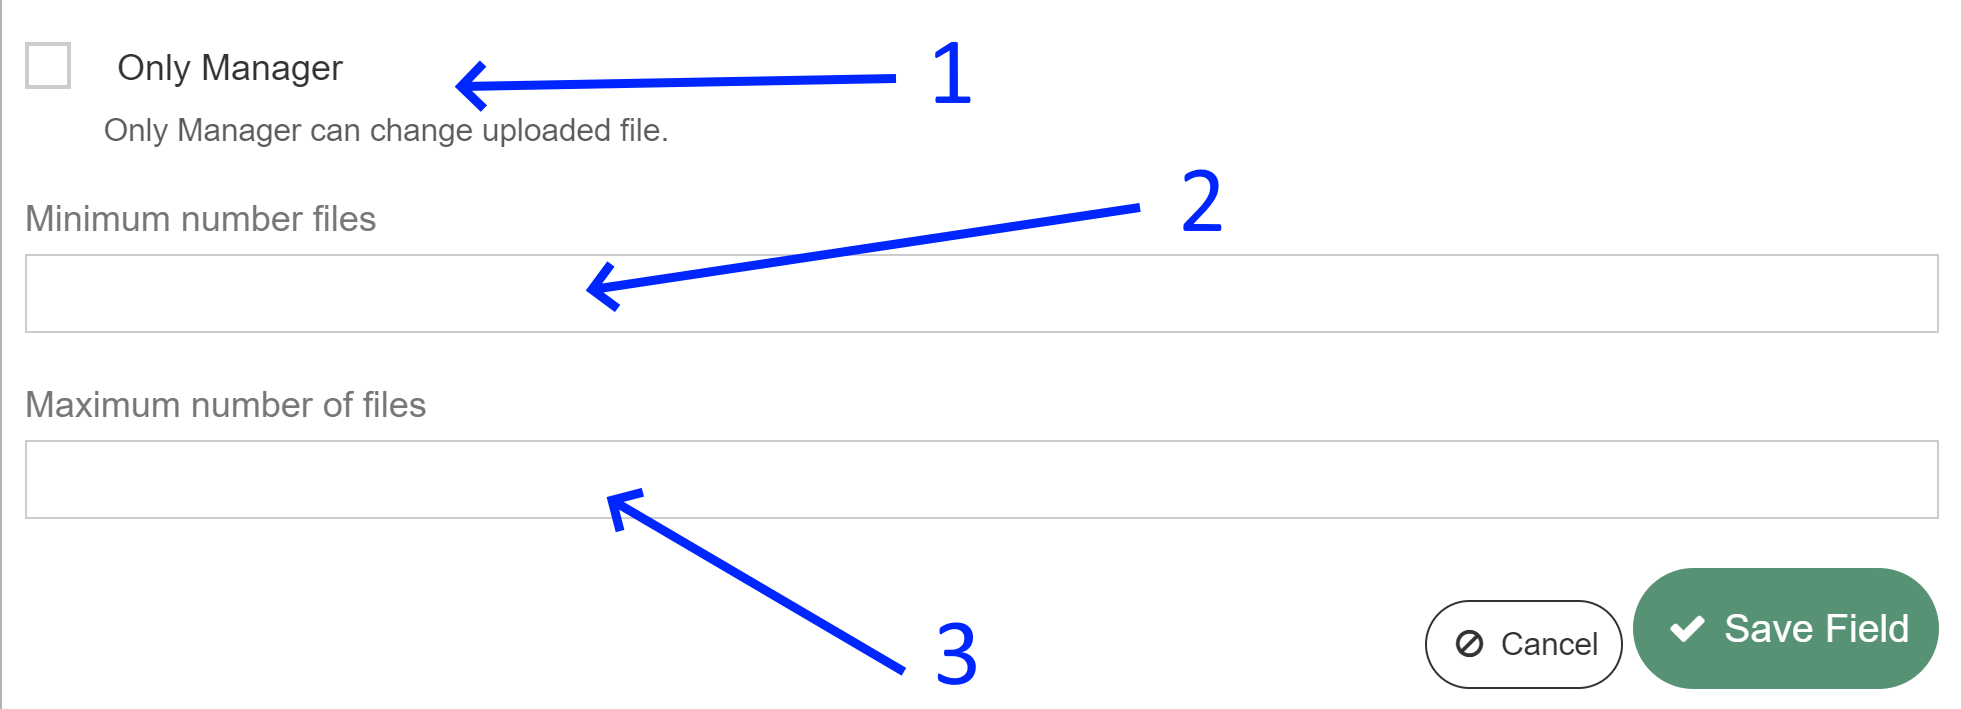
-
File Deletion Permissions: Once the file is uploaded (e.g., by the user/client), only the manager has the authority to delete/remove the uploaded file. Leave it unchecked if you allow the client to remove their submission.
-
Minimum Number of Files: The form cannot be submitted until this field has been uploaded with at least one file attachment.
-
Maximum Number of Files: The form cannot accept more than the designated amount of uploads into this custom field.
Date Custom Field
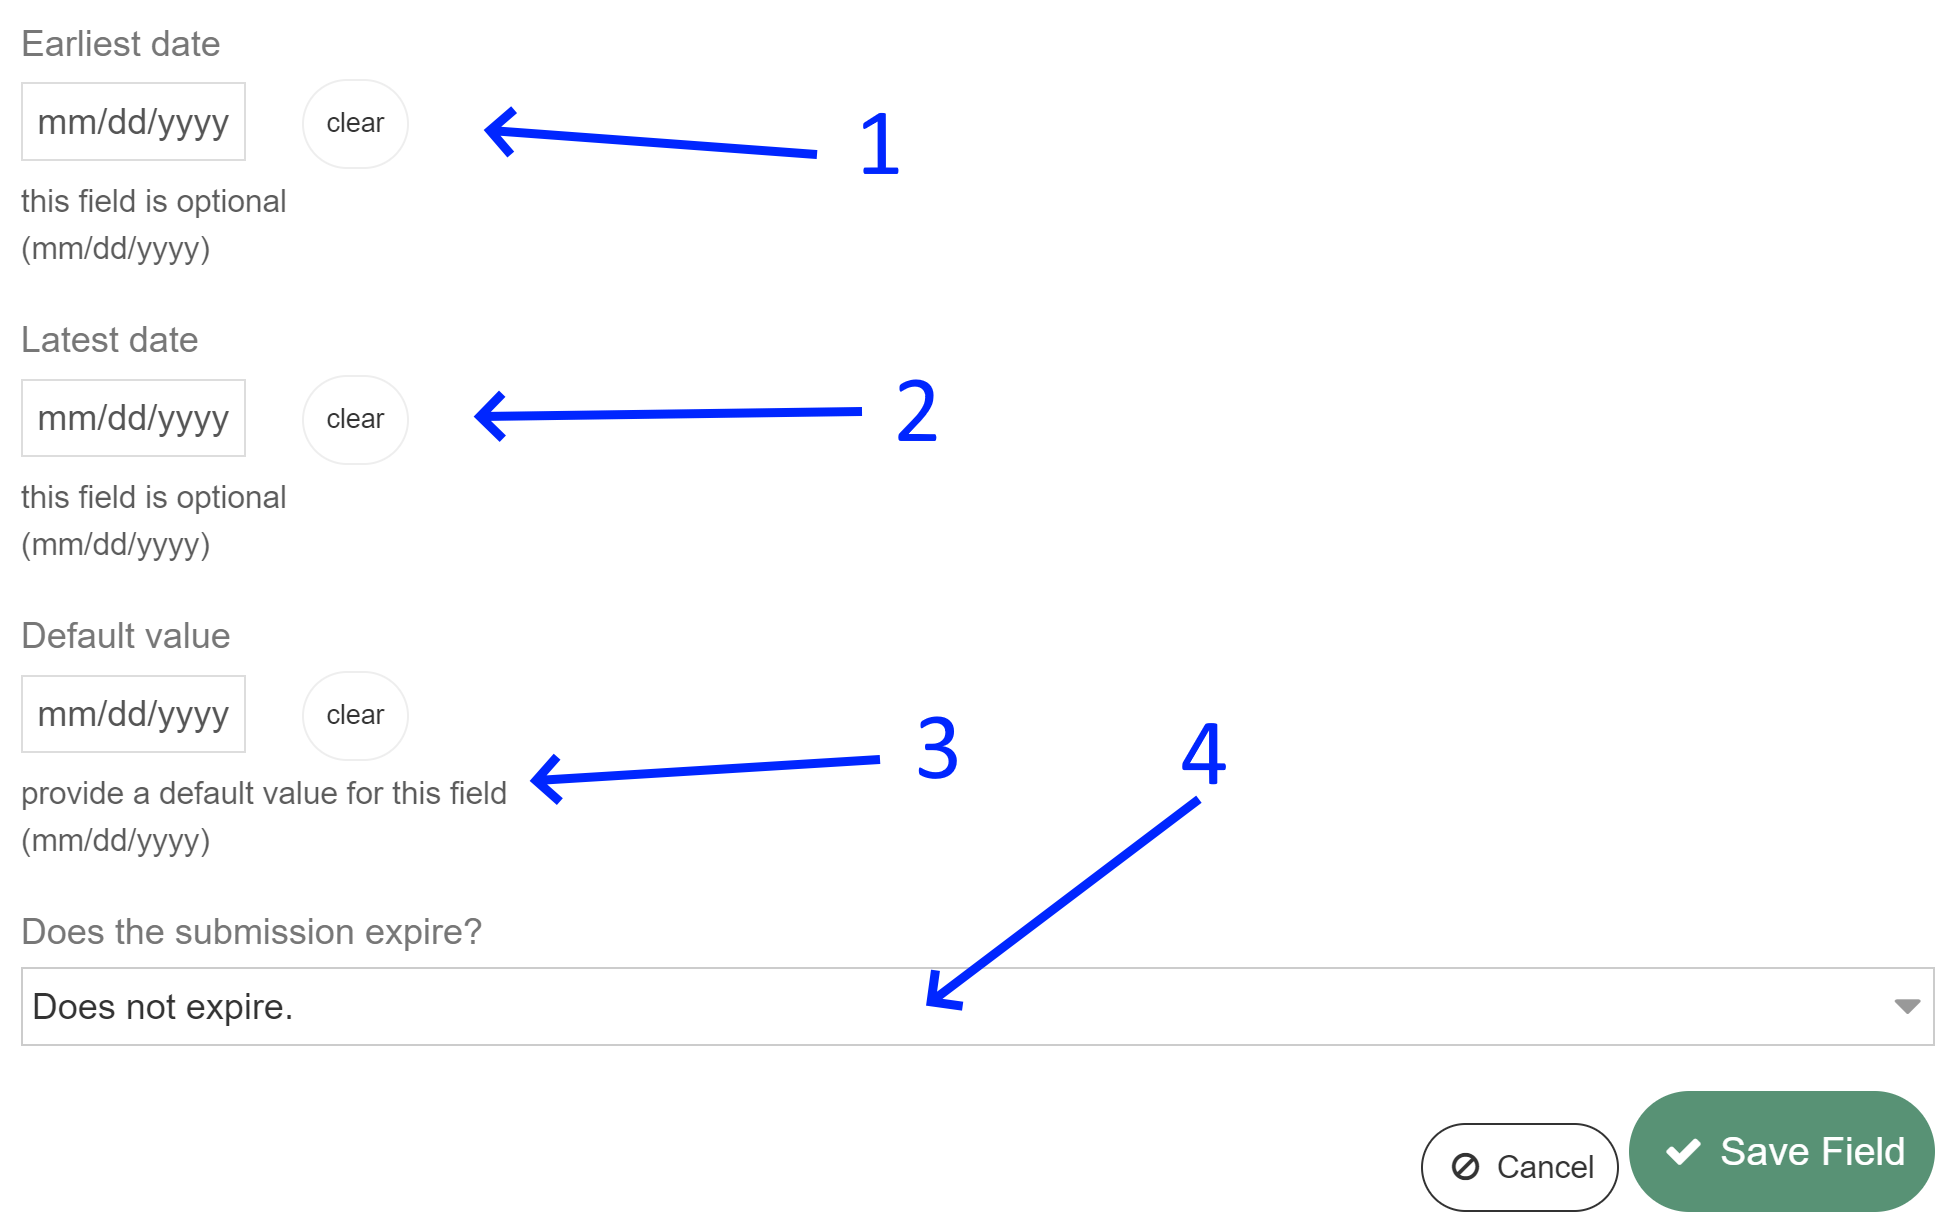
-
Earliest Date: By defining a specific date in the settings, users completing the form cannot select a date earlier than the specified entry for this field. This ensures that dates chosen fall within the desired range.
-
Latest Date: Similarly, if a specific date is defined in the settings, users completing the form cannot select a date later than the specified entry for this field. This helps to restrict the selection of dates within a certain timeframe.
-
Default Date: If there is a date that is commonly selected or serves as a default option, setting it as the default date saves users time by automatically preselecting this date. Users can still modify the date if needed.
-
Expiry Settings: The form can be configured to expire based on the date entered in this custom field. By utilizing this feature, the form's validity can be determined by the date entry, ensuring timely completion and preventing outdated submissions. For more detailed information, please refer to our example on vaccinations.