
Managers and staff members, granted the appropriate permissions, have the capability to add any membership or package to an invoice. However, to streamline the process and empower pet owner clients, it is advantageous to direct them to add the desired memberships or packages to their cart for self-purchase. By integrating the "List of Memberships And / Or Packages" widget into your website, you can simplify the purchase procedure and deliver a seamless experience to your clients. Let's now proceed with a comprehensive guide on transforming your website into an efficient platform for managing membership and package purchases.
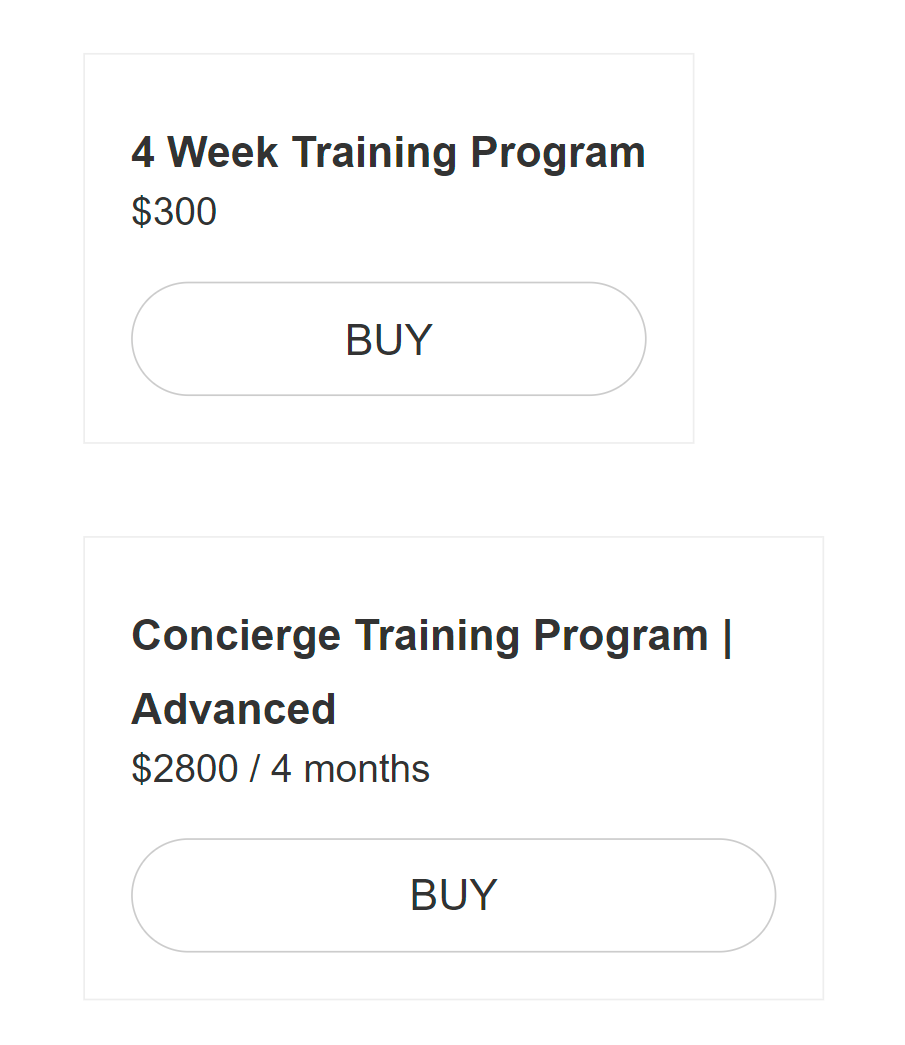
Here's an example of an add-to-cart widget on your website:
Before delving into the process of incorporating the memberships and packages widget into your website, it is essential to fulfill a few prerequisites. Firstly, ensure that you are logged in as the business manager, and secondly, verify that you have already created at least one membership or package within your system.
Once these initial steps are completed, follow the instructions below to seamlessly integrate the widget and provide an enhanced user experience for visitors to your website:
-
Create/Edit a Page: Start by creating a new page or editing an existing one on your *website*. This will serve as the canvas for adding various elements and widgets.
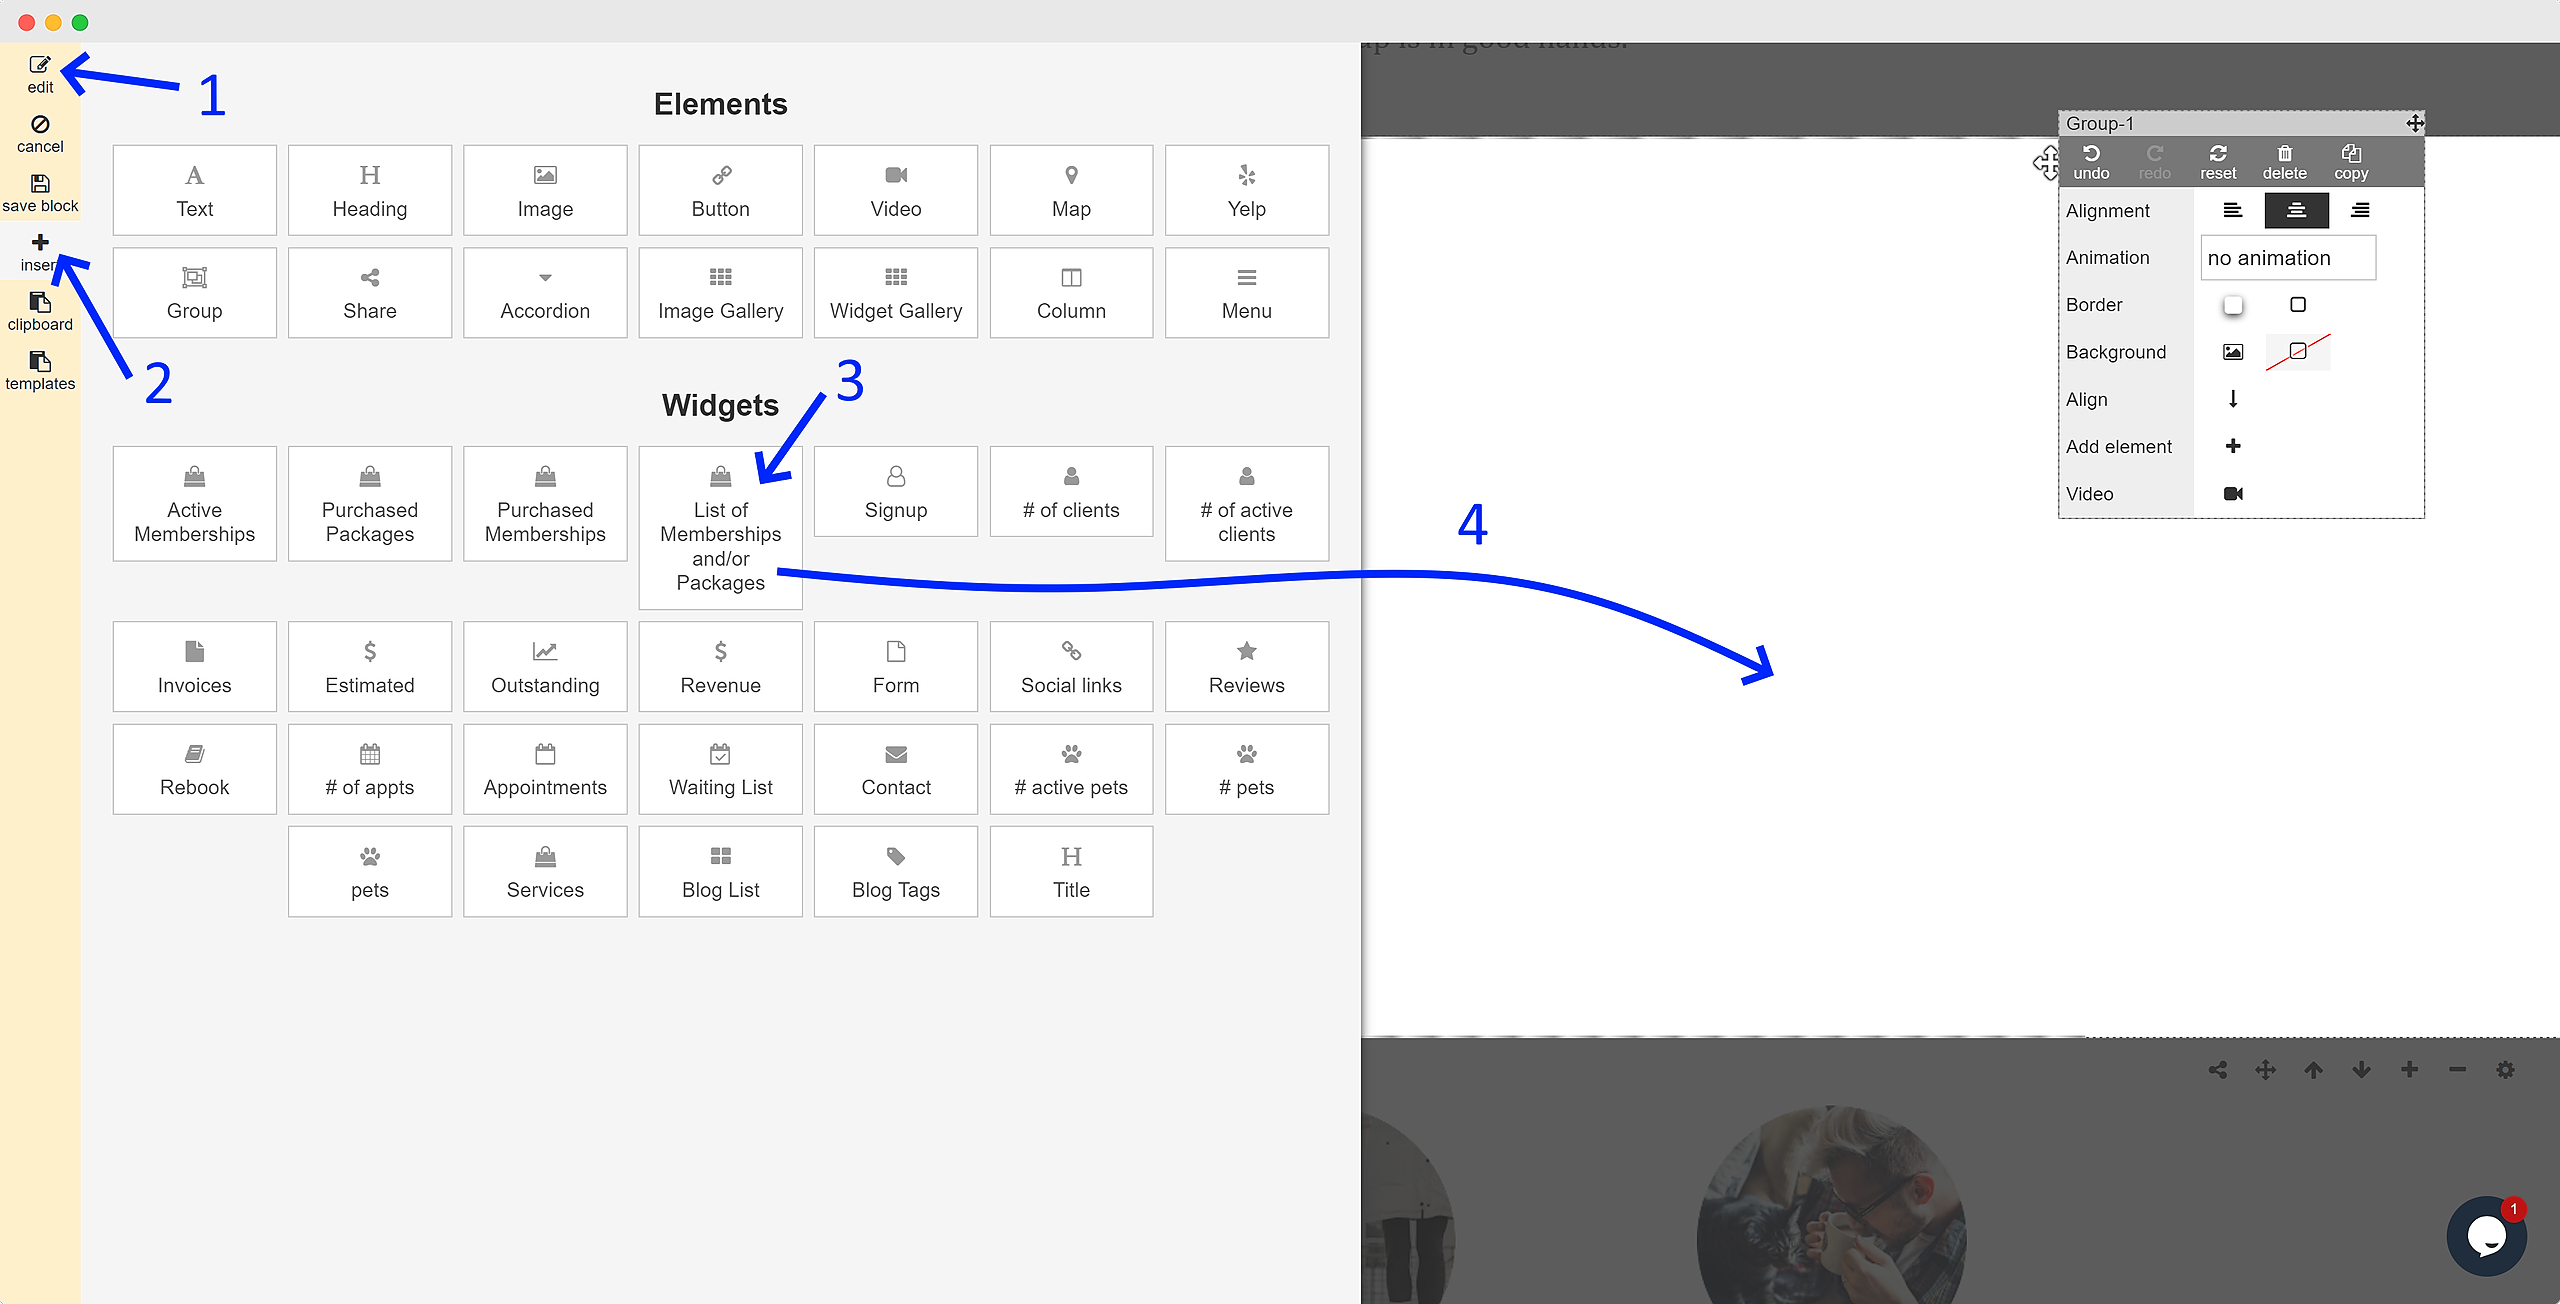
- Insert an element / widget
- Select "List of Memberships and/or Packages" under Widgets, the add-to-cart widget which can be tailored to your specific requirements.
- Drag the object into your page for further configuration.
-
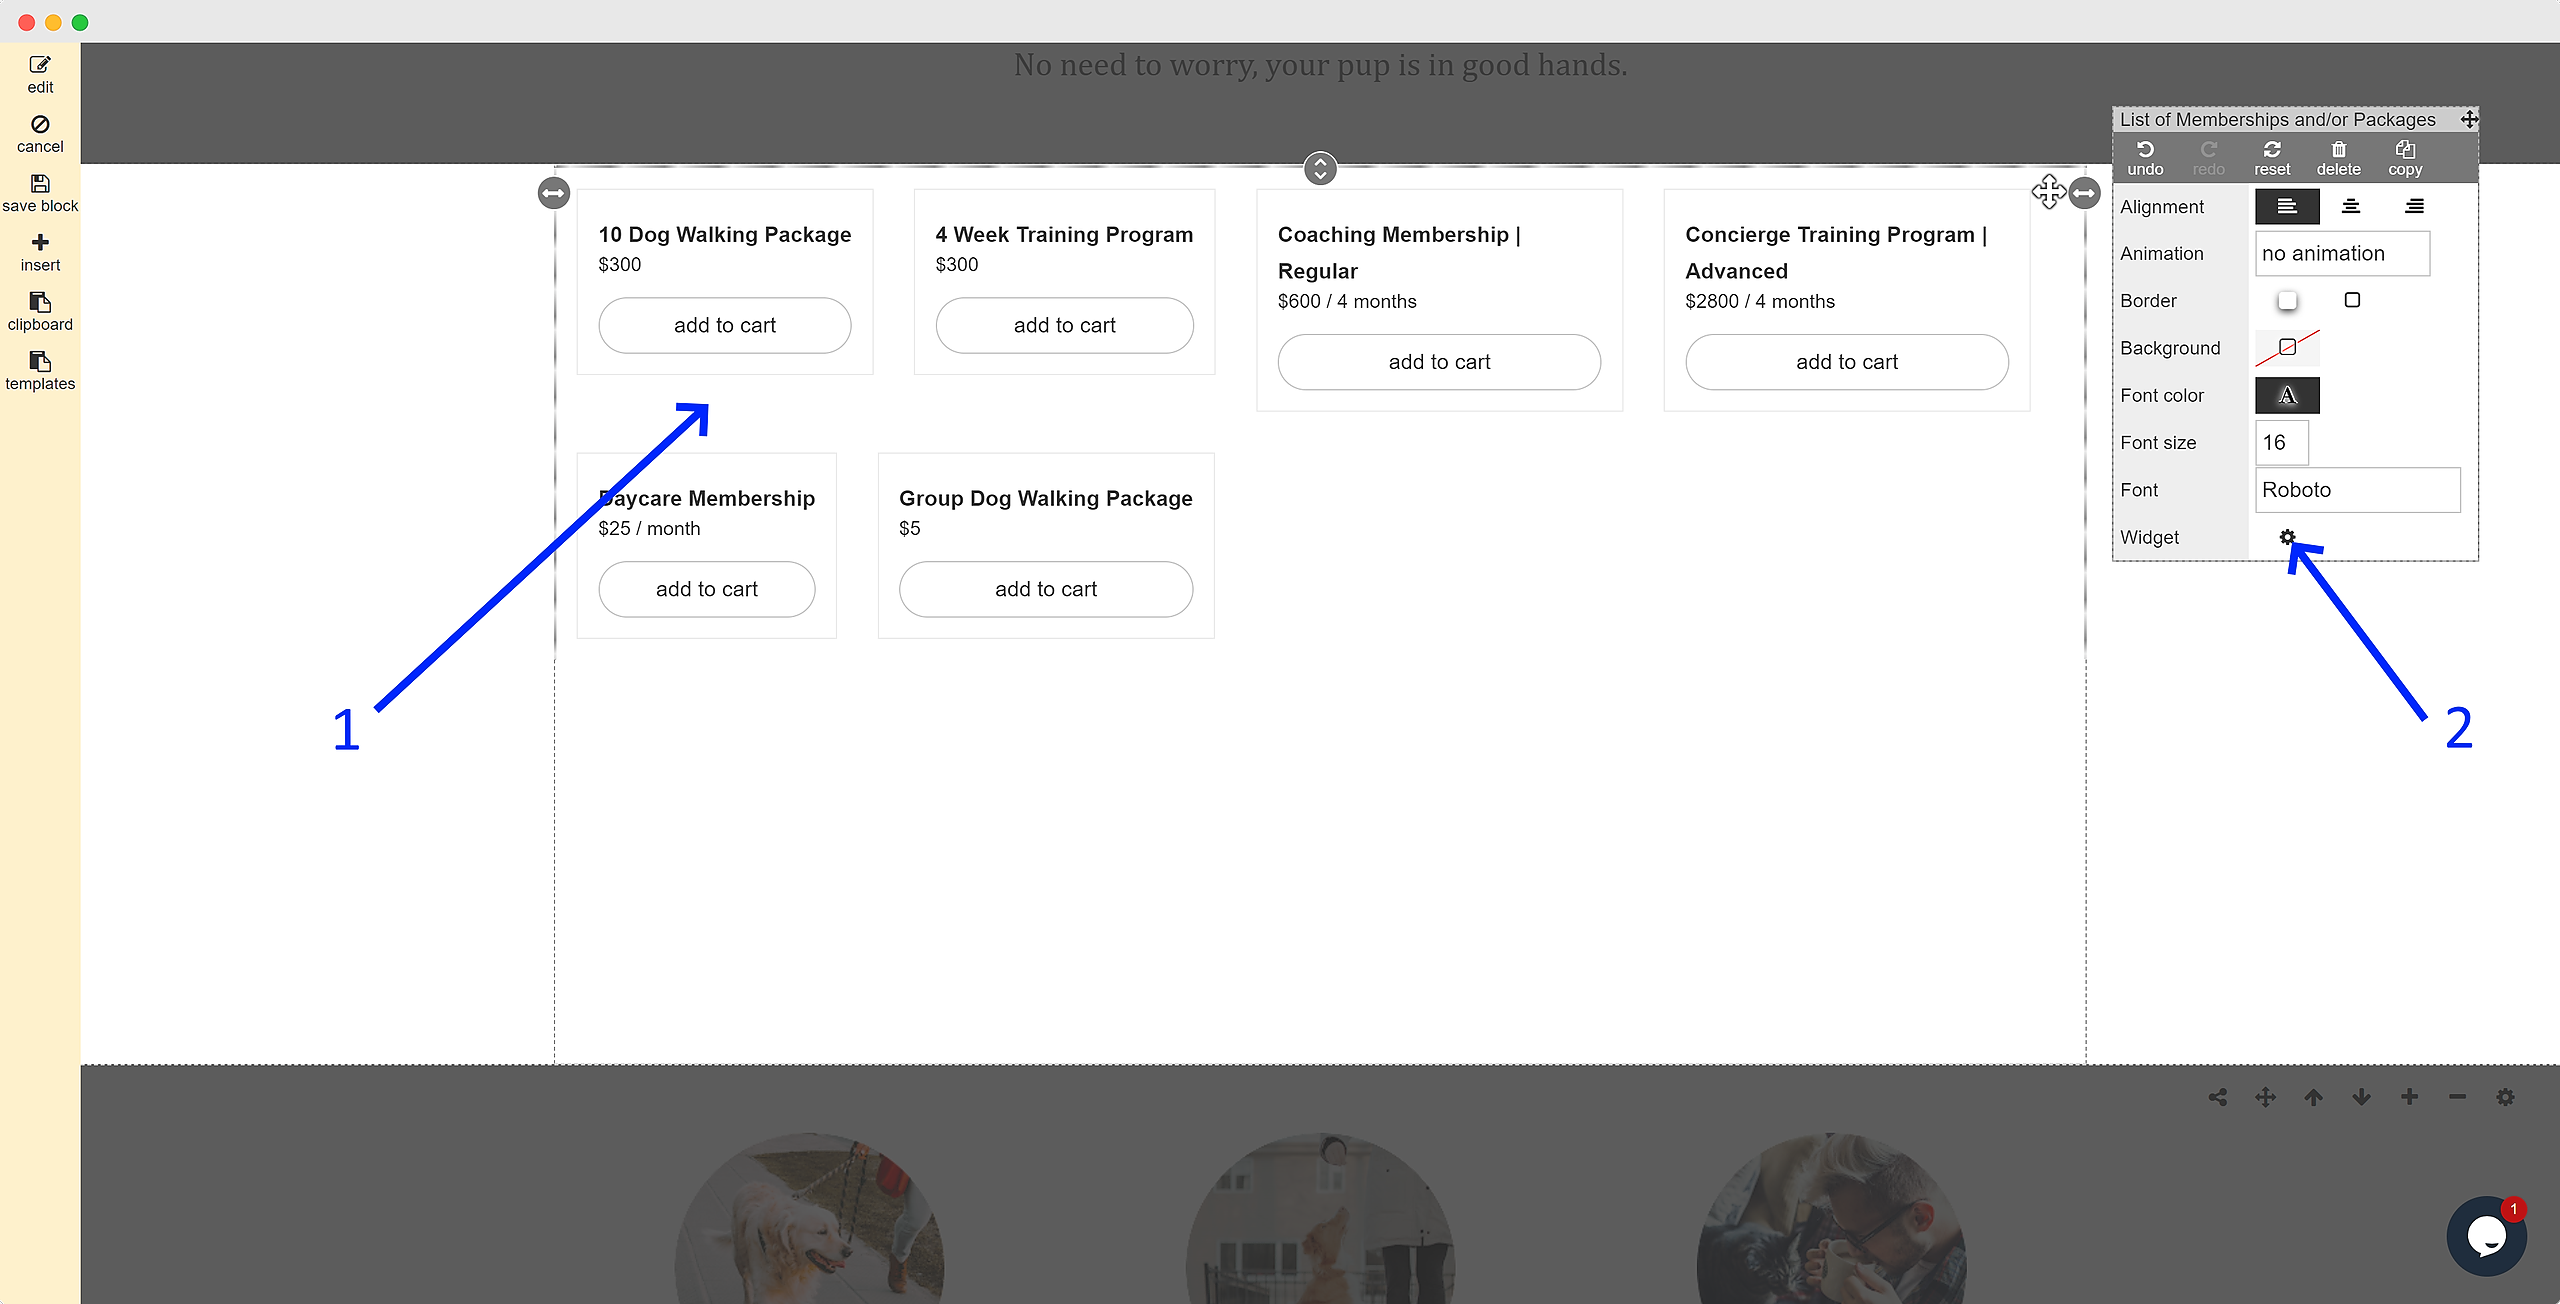
Left-click on the New Widget: Begin by left-clicking on the newly added widget on your page. This action will enable you to access its settings and make necessary adjustments.
-
Access the Configuration Options: Locate the gear icon within the corresponding editor window and click on it. This will open up a configuration menu where you can fine-tune various aspects of the widget to align with your preferences and requirements.
When configuring the widget, you have multiple options to determine how add-to-cart packages and memberships are presented. Tailor the display to your preferences using the following choices:
-
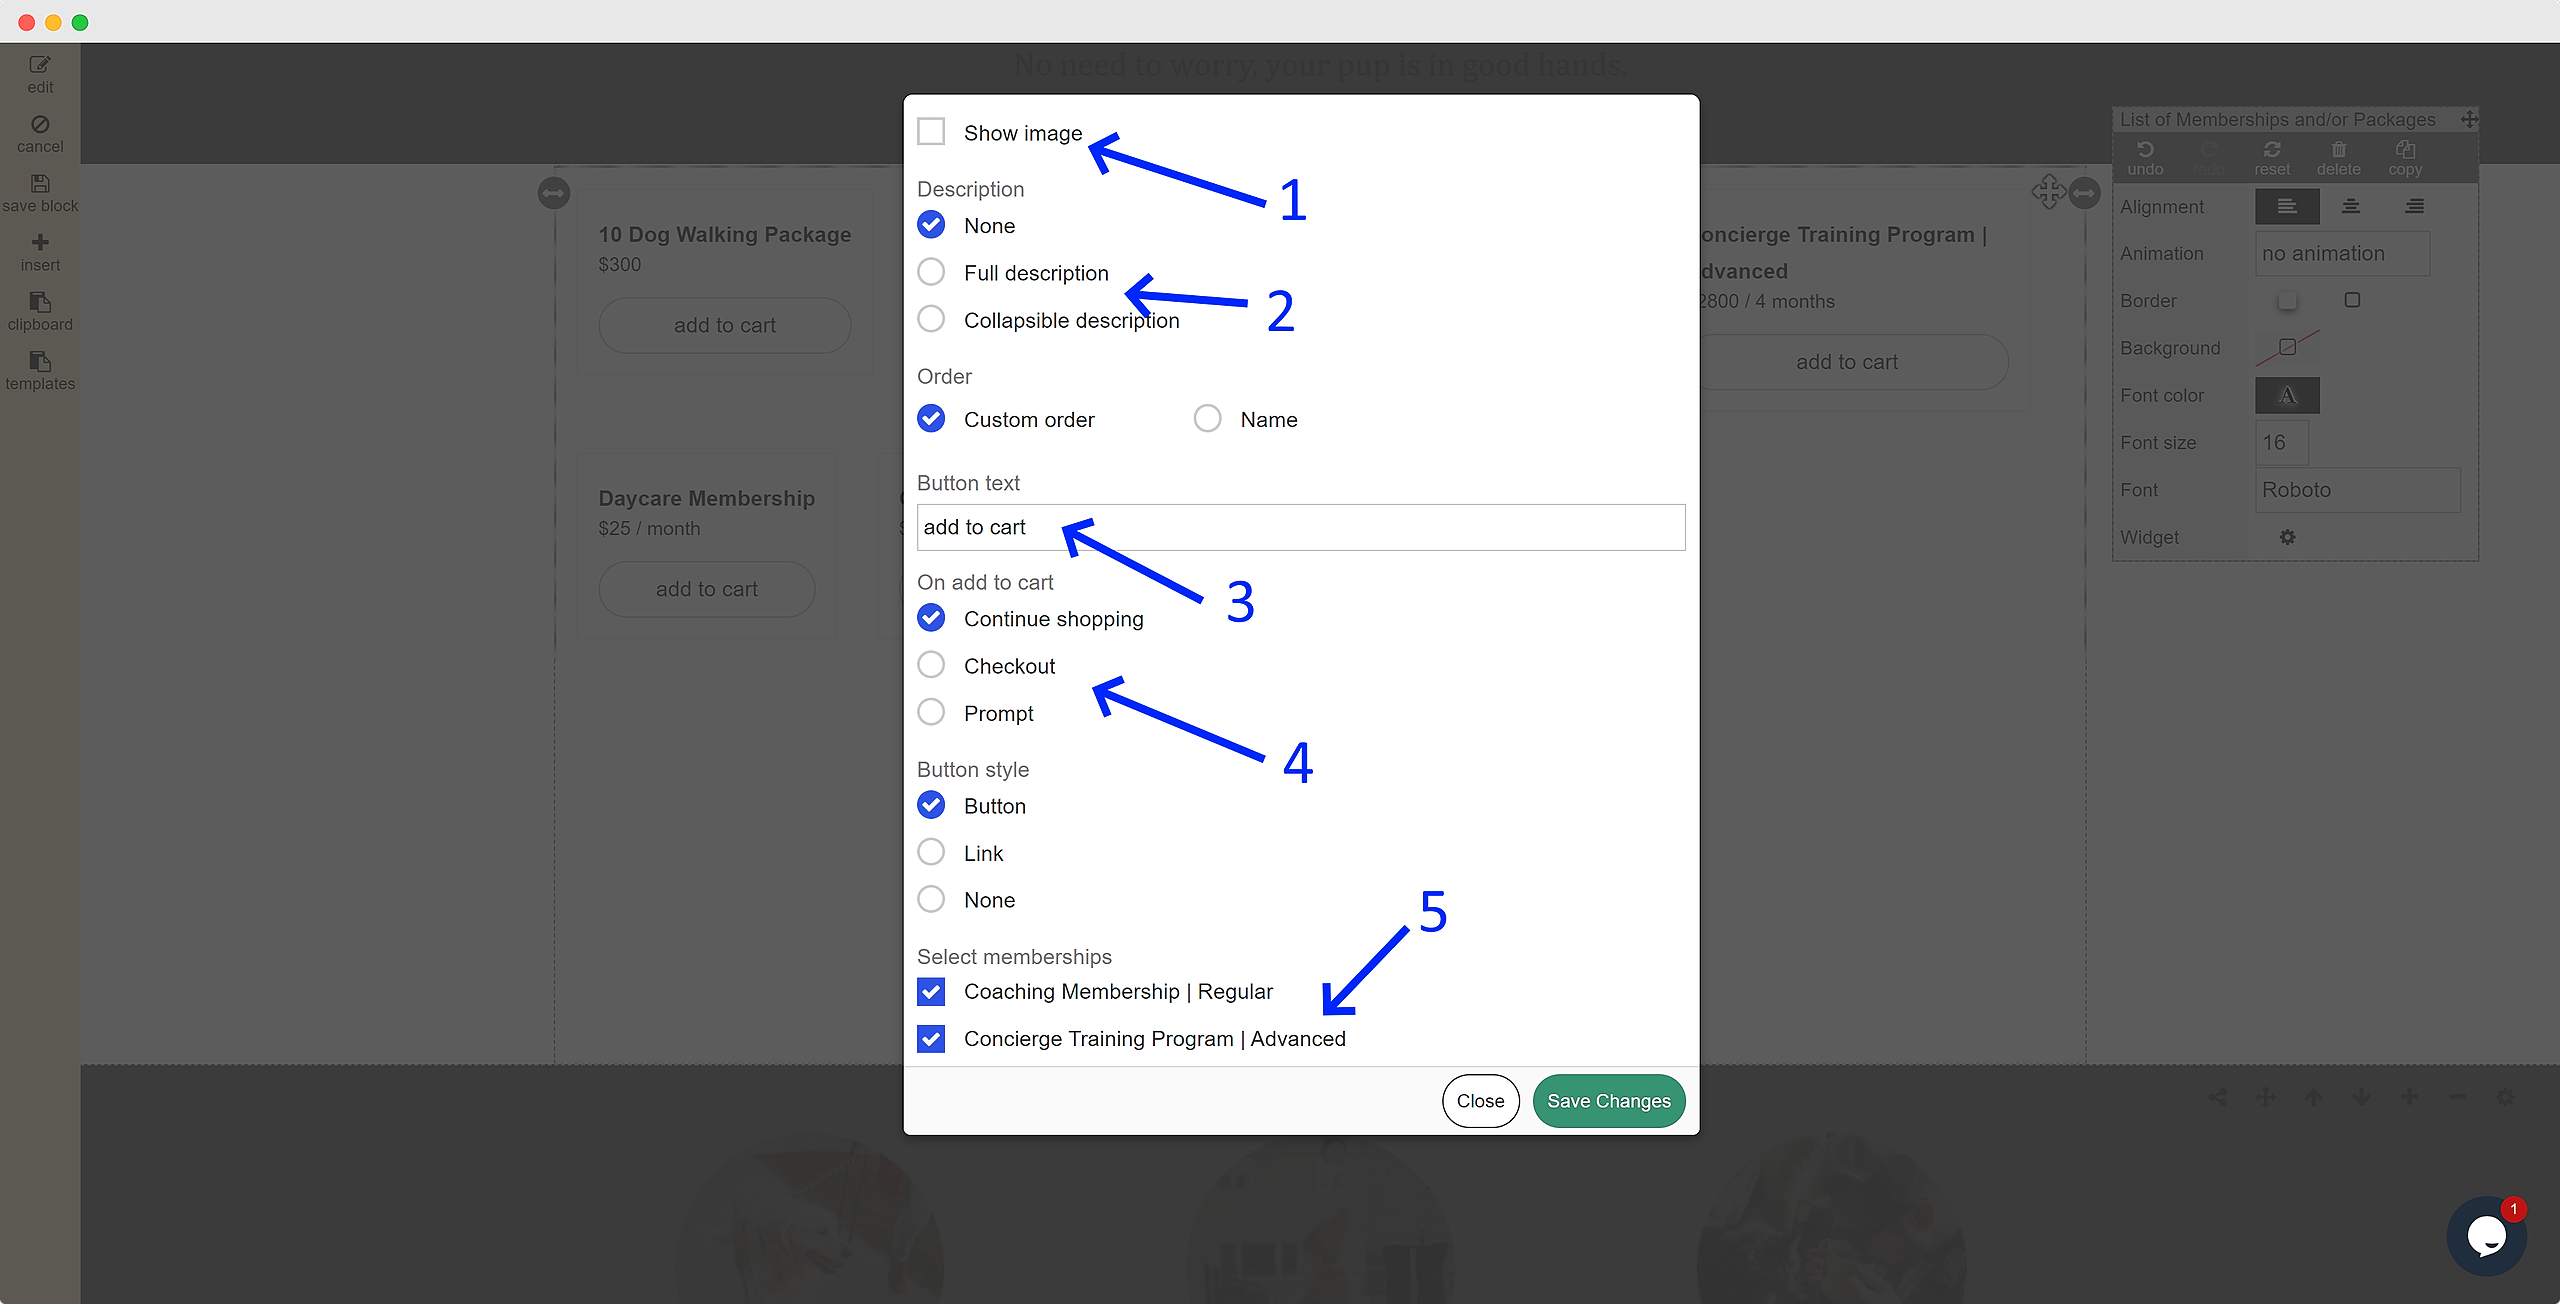
Show Image: Choose to include an image sourced from your membership or package settings.
-
Description: Determine how the description is displayed, if at all. If you have a lengthy description, it is advisable to select "Collapsible Description" to conserve screen space. This allows users to expand and view more details as needed.
-
Add To Cart Button: The default text on the button for purchasing a membership or package is "Add to Cart," but you can customize it. Examples of alternative text include "Buy," "Buy Now," "Purchase," and more.
-
On Add To Cart Action: When a user clicks to buy the membership or package, you have several options:
-
Continue Shopping: The online cart retains the added membership or package for the user to access later when they return to the cart.
-
Checkout: Direct the user to their online cart to review the new item and proceed with the purchase.
-
Prompt: Prompt the user with a choice to continue shopping or proceed to checkout immediately.
-
-
Select the Memberships and/or Packages: Choose the memberships and/or packages that you want to be listed in this widget.
By configuring these options, you can create a tailored and user-friendly experience for your customers when adding memberships or packages to their cart.