Photos of pets can be saved online during your pet care appointment. This process can be accomplished using any internet-enabled device. If you are using a mobile phone, as illustrated below, you will also find options for the camera.
Please note that when using the camera, the web app will not save the photos in your photo library to help conserve space on your device.
As long as you have access to an appointment, options are provided to select or take photos to be shared with the pet owner client.
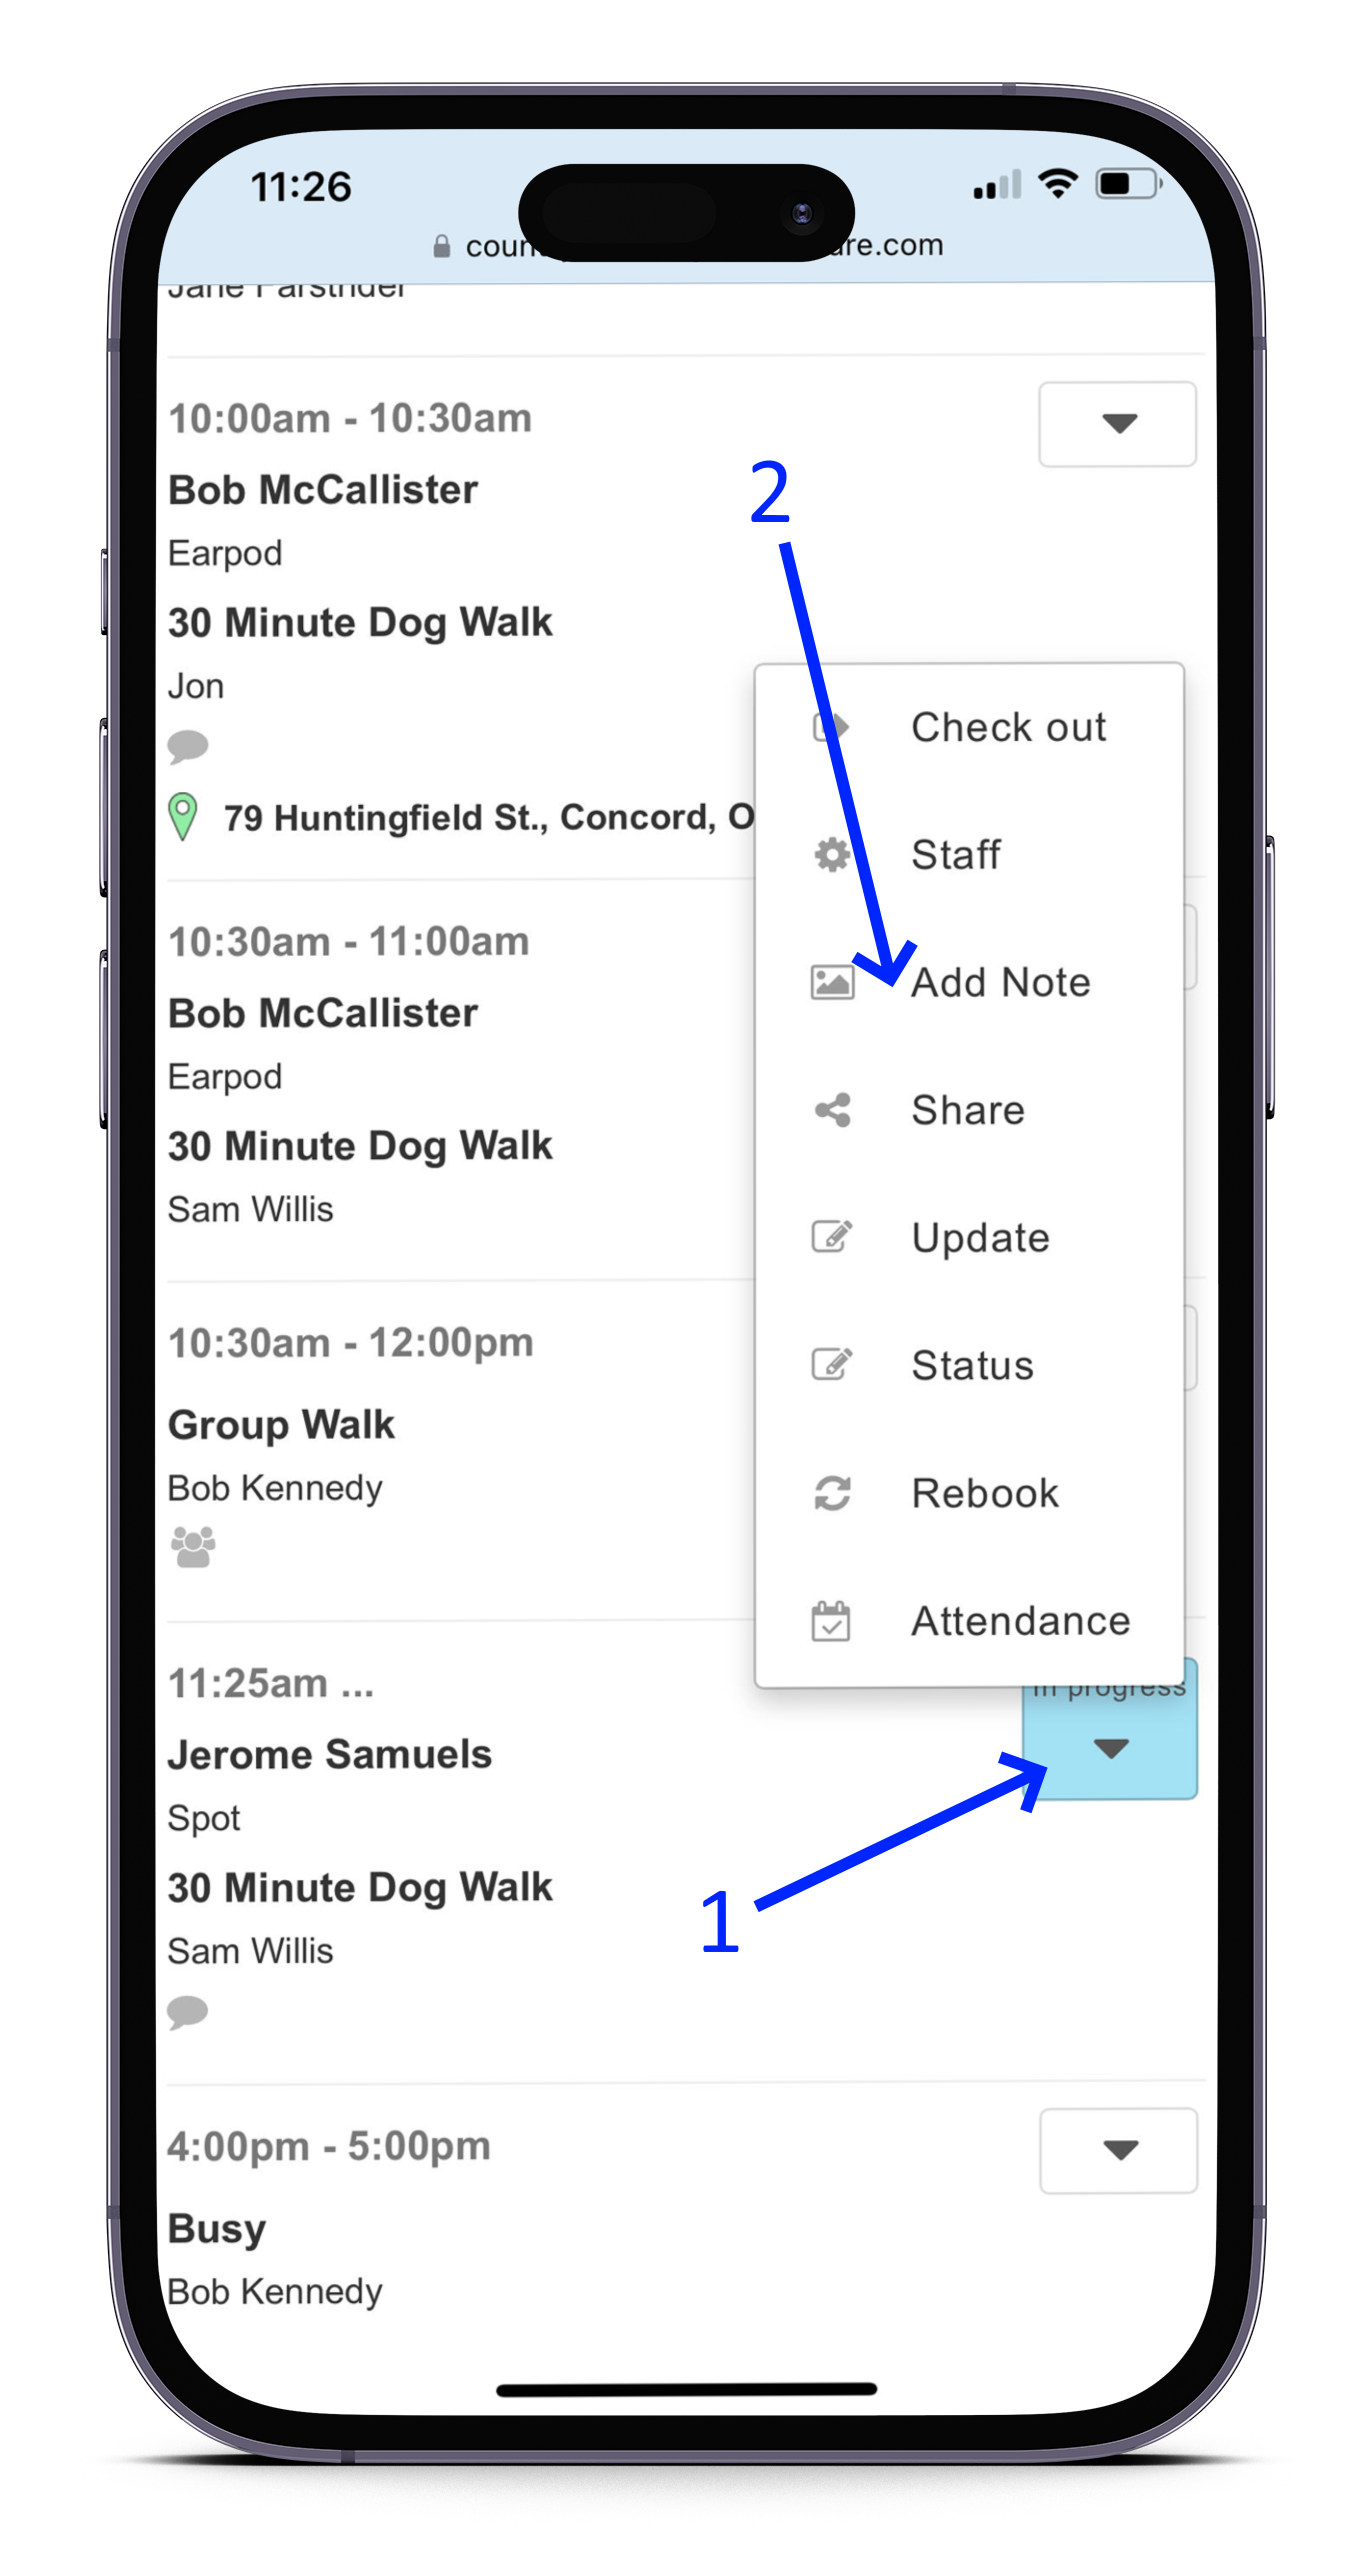
For instance, in the agenda view of appointments, there is an action to add media:
-
Select the Action drop-down, and
-
Choose "Add Note."
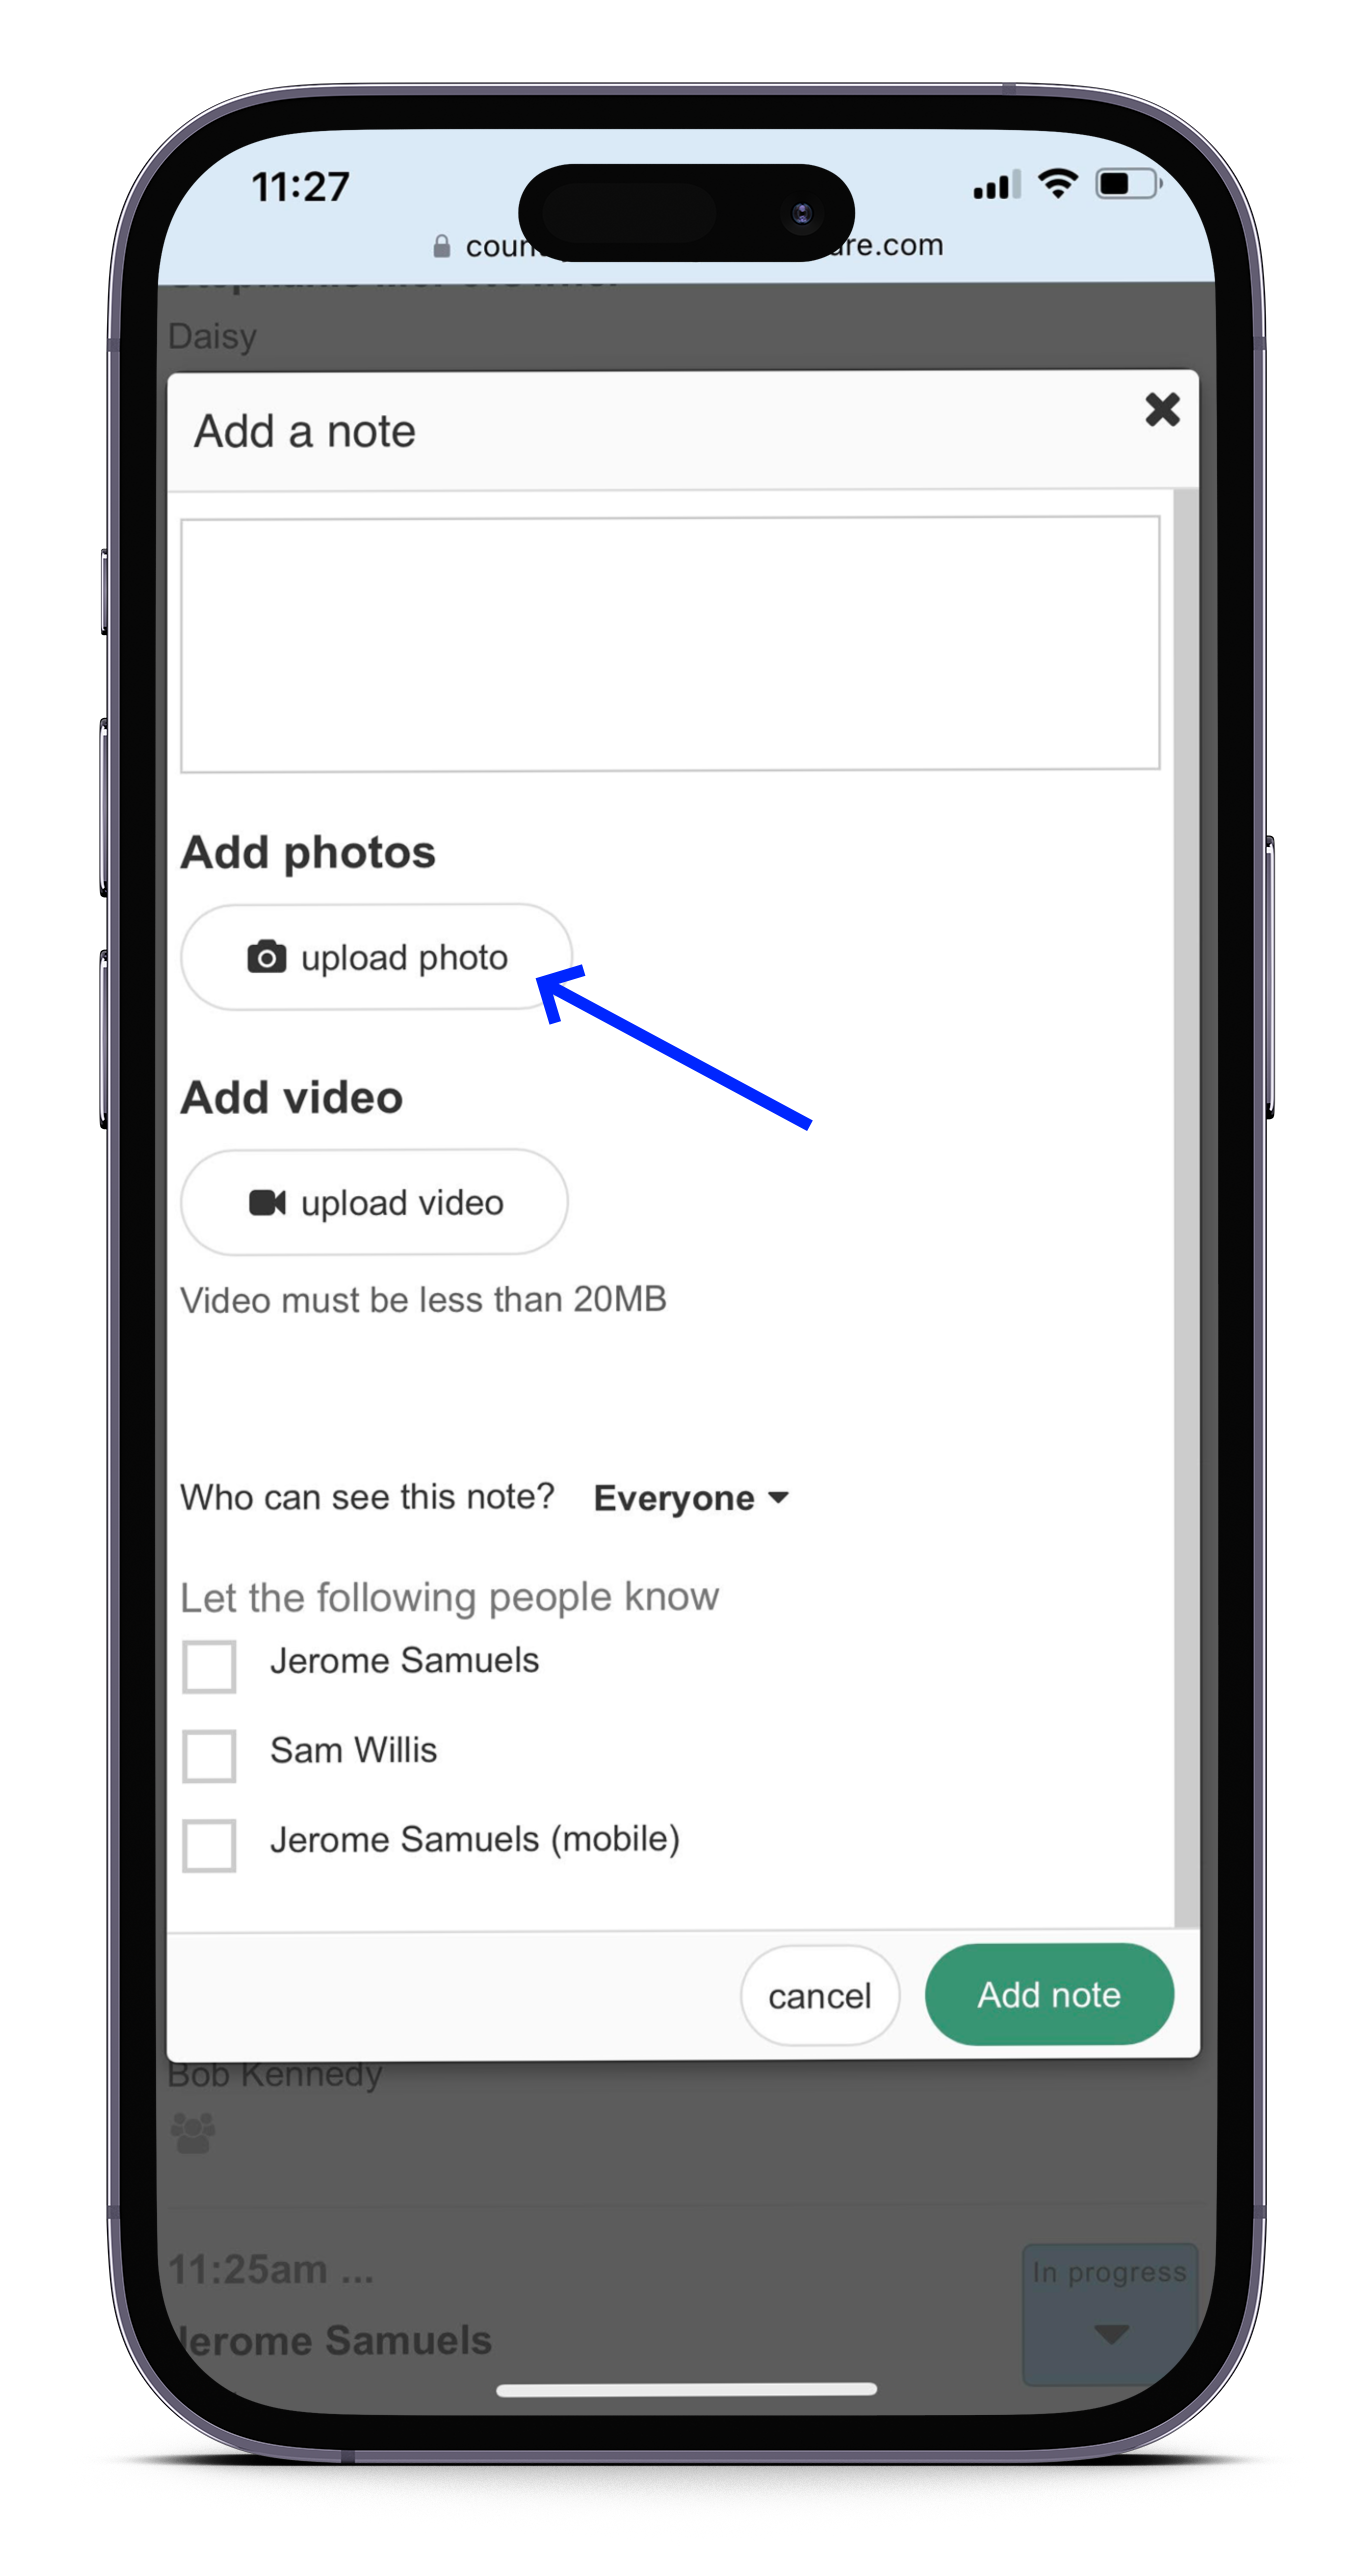
Click the "Upload Photo" button in the next screen:
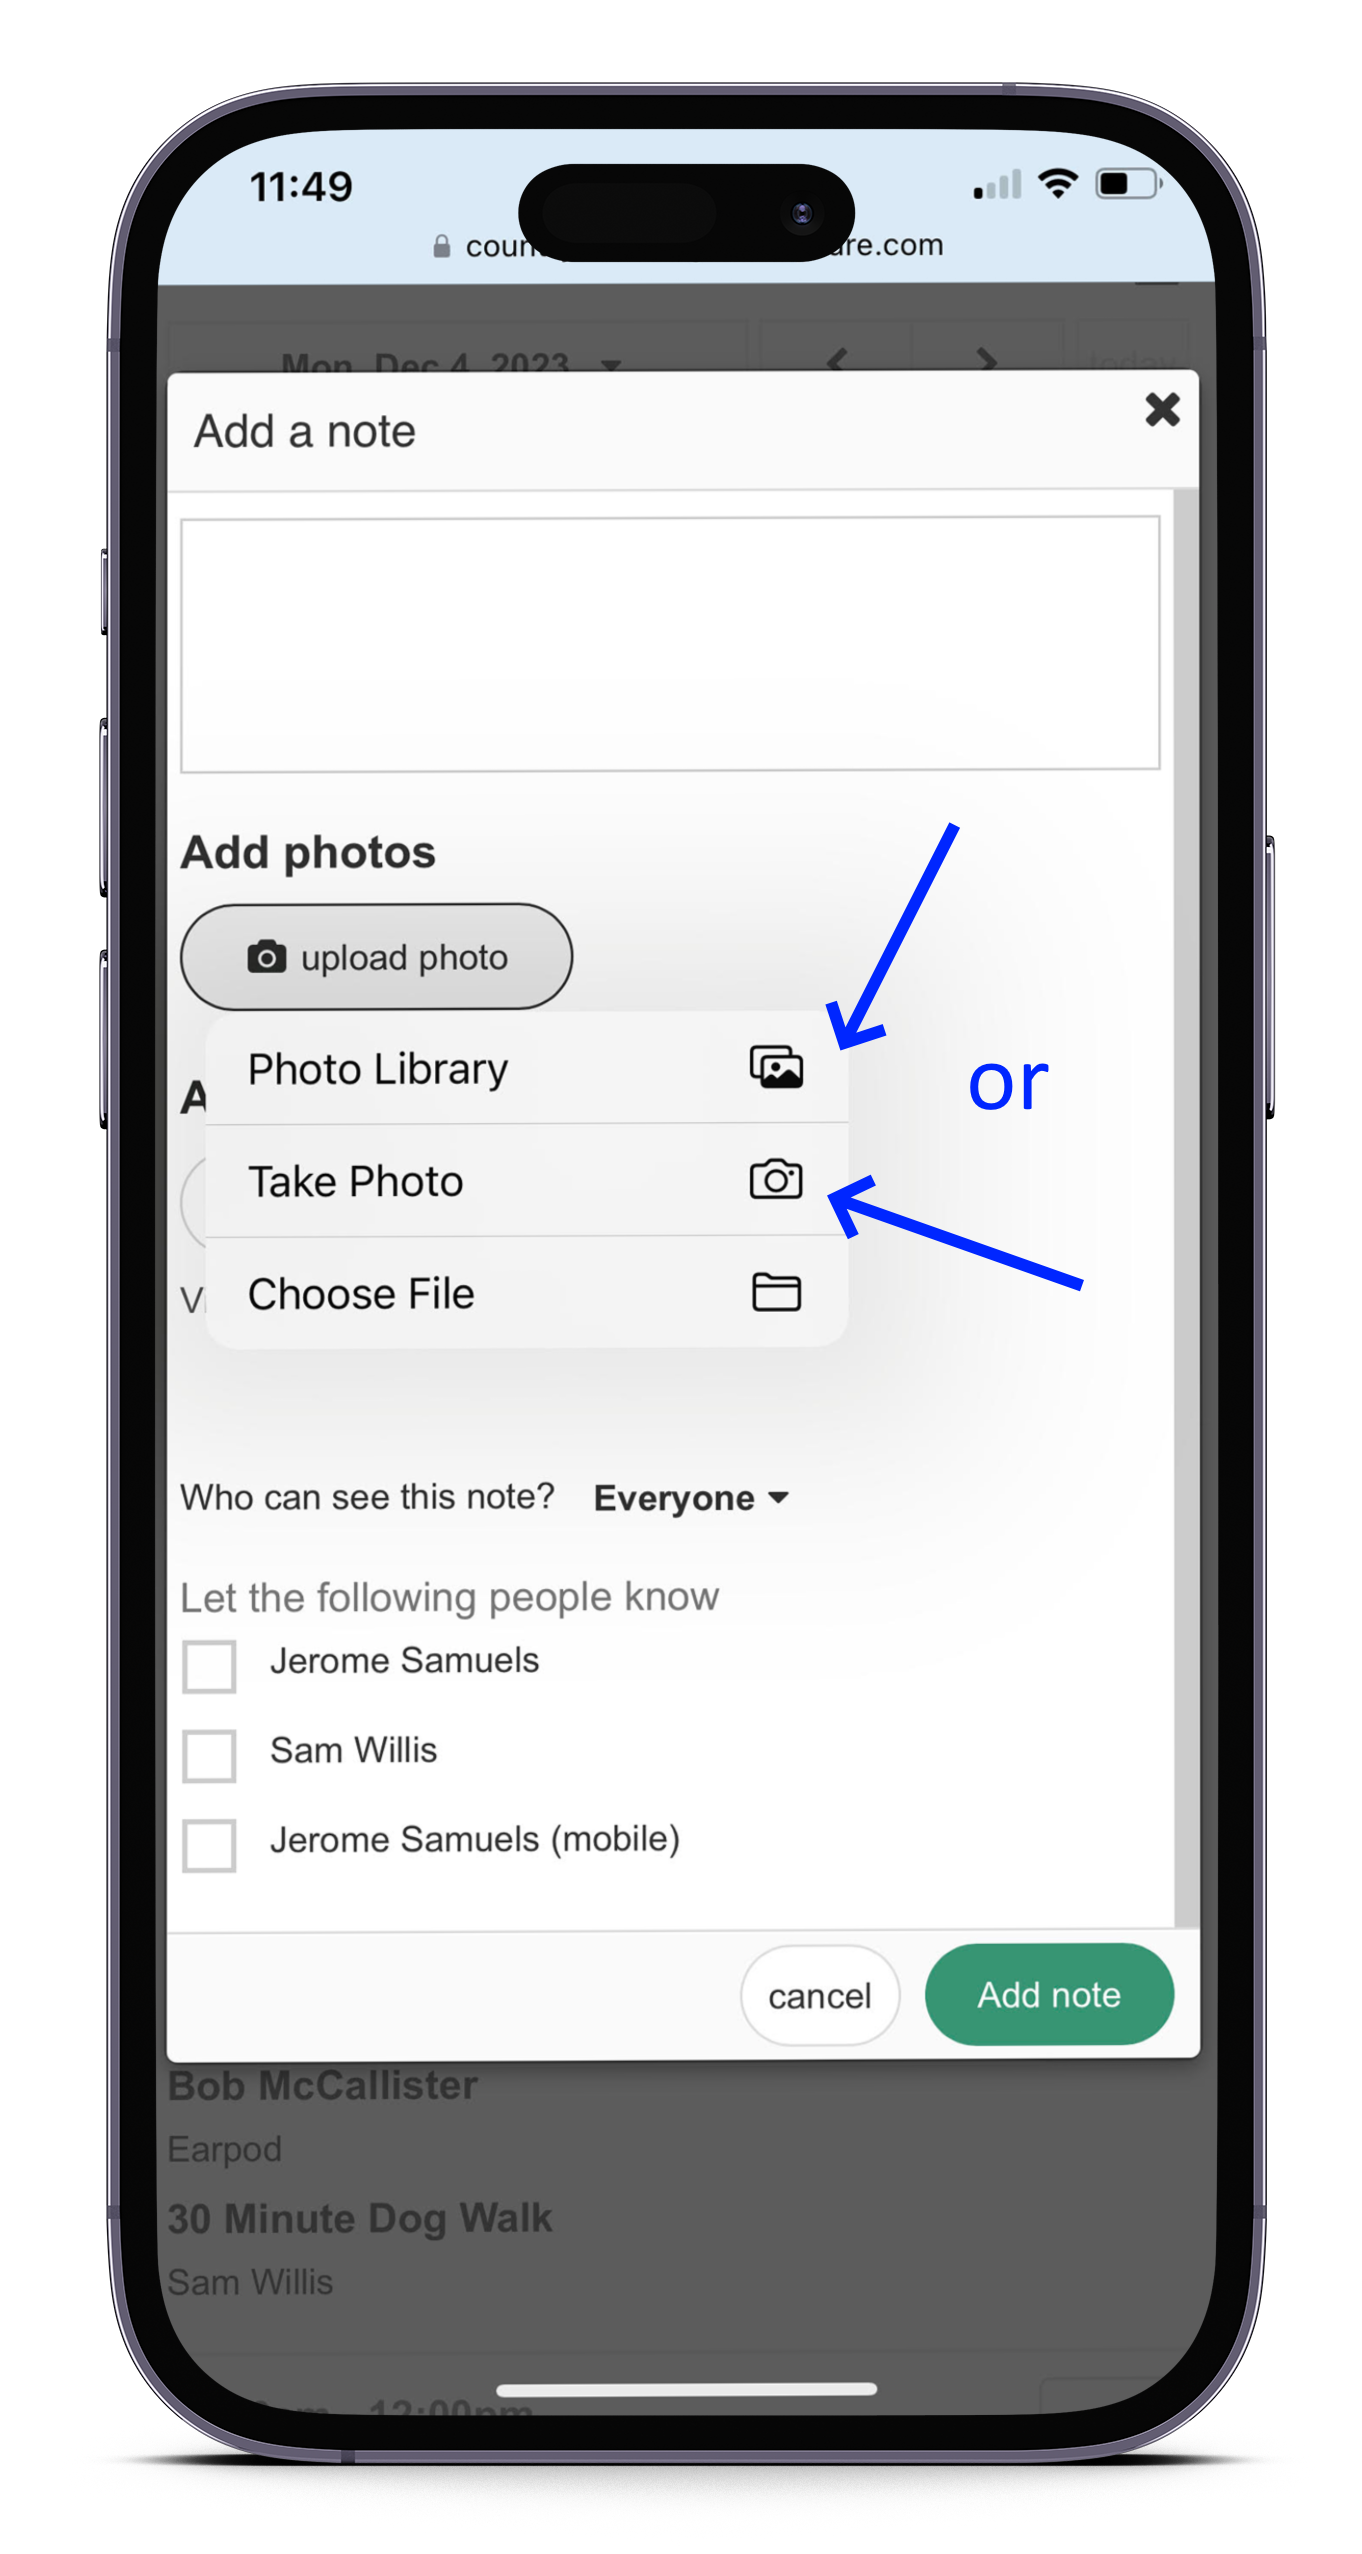
If you saved a couple of quick snapshots earlier in the day, you can select "Photo Library" to upload to pictures and images to the appointment at this time. Alternatively, select "Take Photo" to access the camera for real-time upload of photos to the appointment.
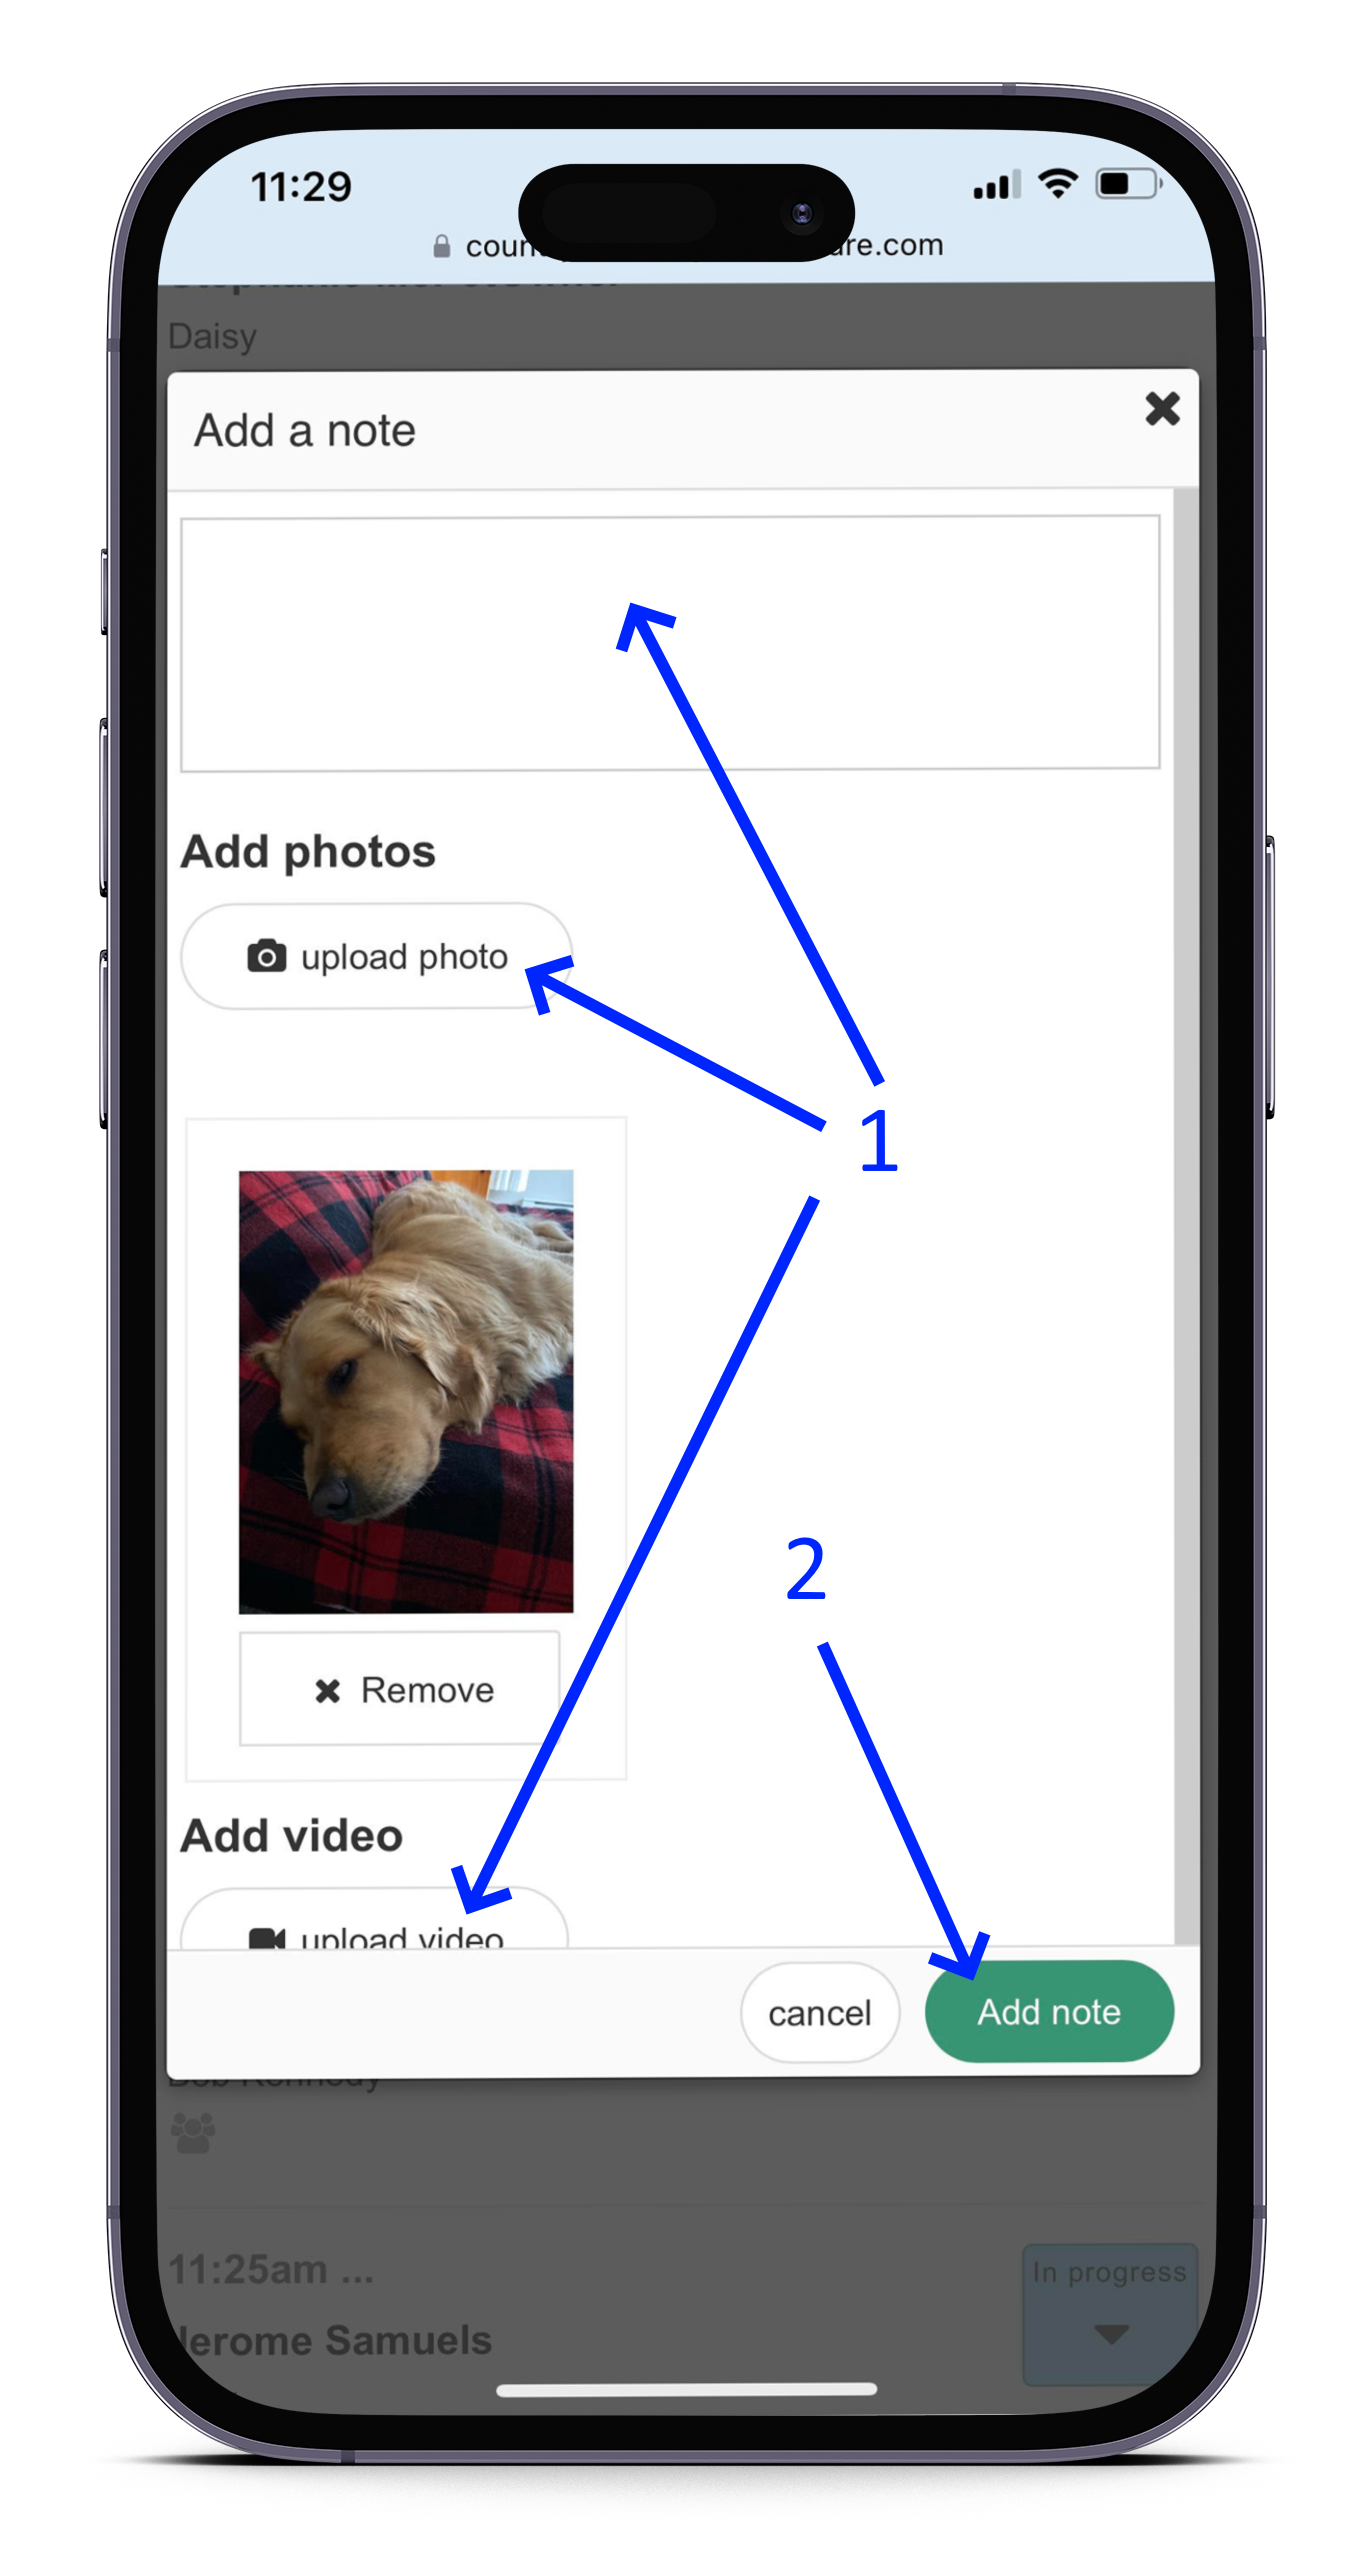
Now you have the ability to:
-
Add additional media, including text notes and videos. You can revisit this screen at any time to make these additions.
-
To save your photo changes, click the "Add Note" button.
.
The appointment now has the image as well as the report that will go out in an email notification to your pet owner. Your client can always visit their pet portal at any time to view these images.
Option To Keep Media Confidential
With this feature, the stored media (pictures, notes, videos) remains invisible to clients. If the manager is attaching documentation, they also have the option to hide it from staff members—a confidential space to maintain sensitive information within the context of the appointment.
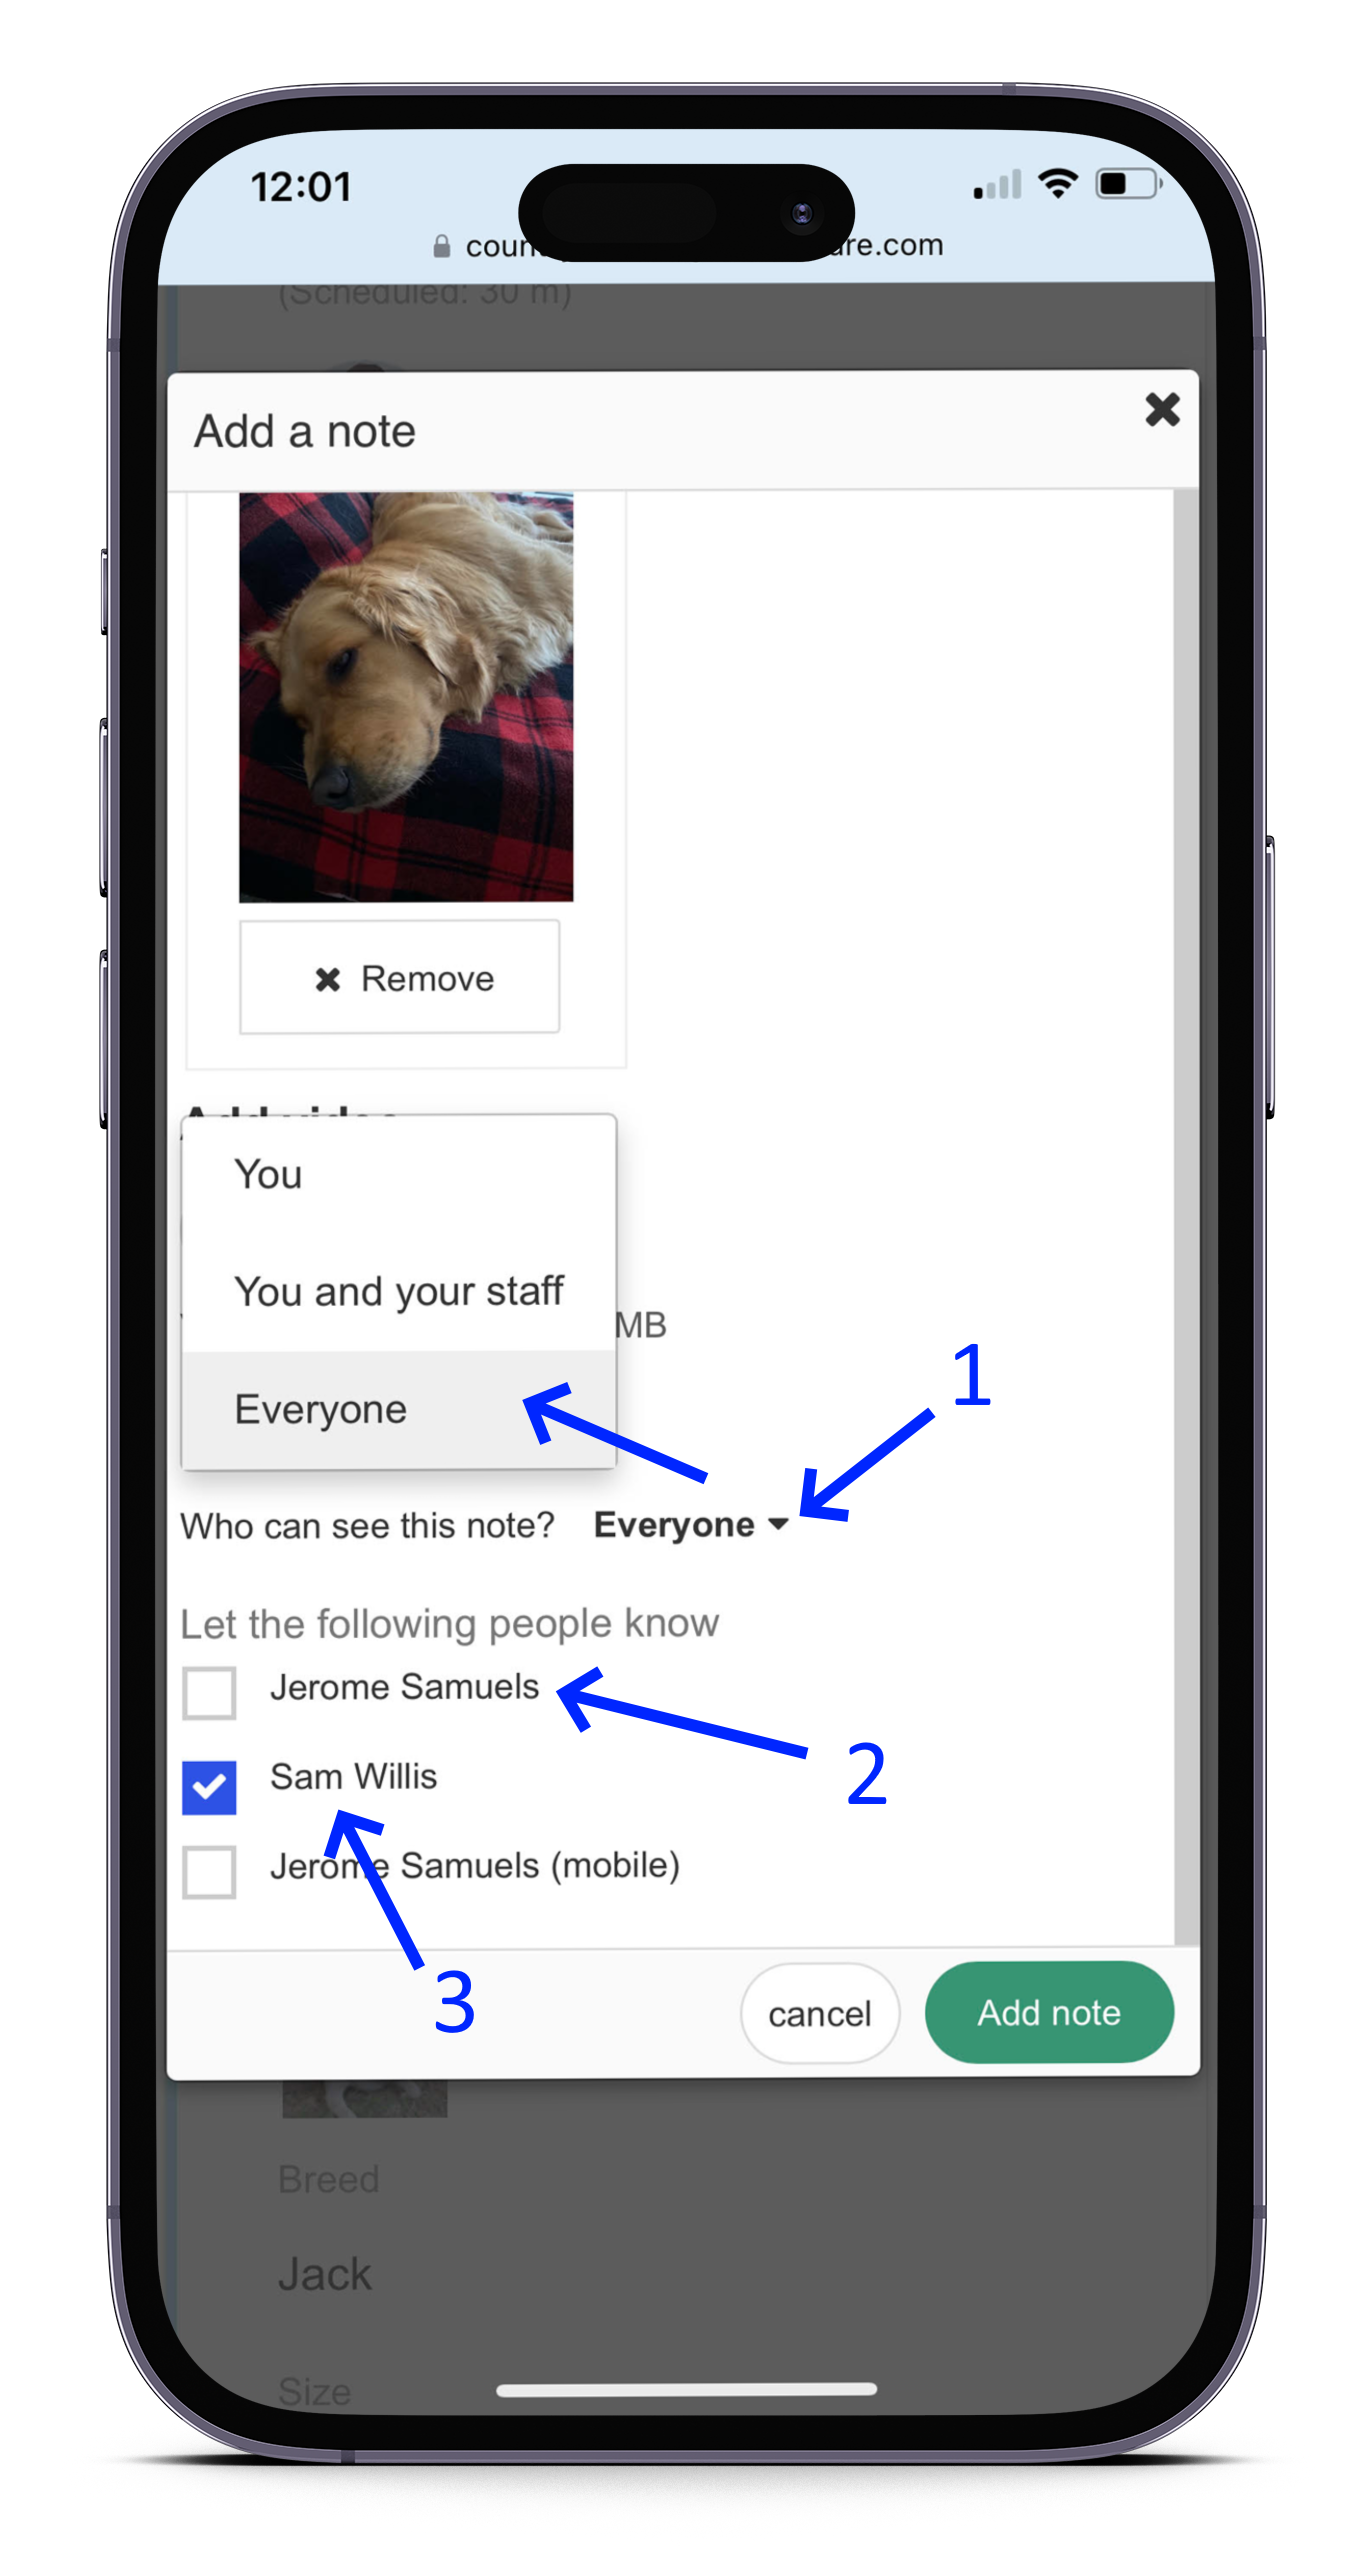
Scroll down to find the following options when adding a note:
-
Select the pull-down menu with choices regarding who can see the newly created media.
-
Choosing "Everyone" in step 1 will display checkboxes, allowing you to uncheck your pet owner client from viewing this media in their appointment.
-
The sample screenshot is from a manager's account, giving them control over whether or not the staff member assigned the job can view the media added above.
ccessing appointments from any scheduling view will lead you to the same interface to save your photos and pictures.
The dashboard offers one-click options, which are worth reviewing here.
Adjacent to the photo-sharing option, you will also find a related option to share videos. The process is very similar, and the steps involved are the same as those described above for photos.
The following video summarizes the instructions mentioned above:
