
Before delving into the availability features described below, it is important to note that you should have already added at least one staff member to work with.
To access a staff member's profile, enter the list of staff members (click staff in your left navigation) and simply click on their name or navigate to the staff window and select "View" from the action pulldown menu. This will allow you to access and review the specific details and settings associated with that staff member.
Next, to set up the available times for a staff member, click on the "Availability" option, as illustrated below. This will enable you to configure their working hours and schedule according to their availability. Ensure efficient staff management by defining their available times accurately and effectively.

Daily Availability
The initial step in setting up availability is determining the specific times during the week when an employee will be available for work. This includes defining their regular working hours and availability. Note that there are additional settings that can be explored below to accommodate variations or exceptions to their regular schedule. By configuring these settings, you can ensure a comprehensive and flexible approach to managing staff availability.

-
Each day of the week is displayed, providing options to set the specific time ranges when the staff is available for work.
-
The settings icon allows you to configure the availability settings for each day of the week individually.
-
The "+" icon enables you to add new time ranges to indicate additional periods when the staff member is available.
-
Various options are available to manage the existing availability settings effectively.
Please note that there is an option to grant permission for the staff member to modify their own availability.
Holiday And Modified Work Schedules
However, it's important to note that these availability settings do not include time ranges for holidays. In the next section of the same window, we will explore the holiday rules and how to incorporate them into the staff member's schedule.

Below the weekly availability settings, you will find a section where you can define the special hours and dates for the staff member. Simply scroll down to access this area.
-
Any existing rules for special hours or off-times are listed in this section. You can review and manage them accordingly.
-
To add more rules, simply click the "+ Add a rule" button. This will allow you to specify additional special hours or off-times as needed.
Here's a closer look at adding a new rule:

-
Title: You have the ability to assign titles to your rules, such as "Christmas Break," "Summer Hours," and more.
-
Dates: Specify the range of dates during which you want this rule to be in effect.
-
Days of the Week: Determine which days of the week the rule should be applied to within the previously defined date range.
-
Define a specific time range indicating your availability.
-
For instance, if the rule states availability from 1-6 pm on Wednesdays, this will be applicable to the Wednesdays of August 17th, 24th, and 31st, 2023.
-
Alternatively, you may use the term "not available" to indicate that there are no entries specifying availability for any of the Thursdays within the given date range.
Google Calendar Integration
This feature relates to the staff member's personal calendar. By granting permission, the system can check their availability based on their Google Calendar. It's important to note that specific details about their personal appointments are not copied or accessible to the management. The system only recognizes their busy status, regardless of whether they have a doctor's appointment or any other commitment.
To complete the required tasks, the staff member should follow these steps after logging into their account:

-
Access the "My Account" settings window.
-
Navigate to the Settings section and locate the option for "Google Calendar."
Click the "Sign in with Google" button:

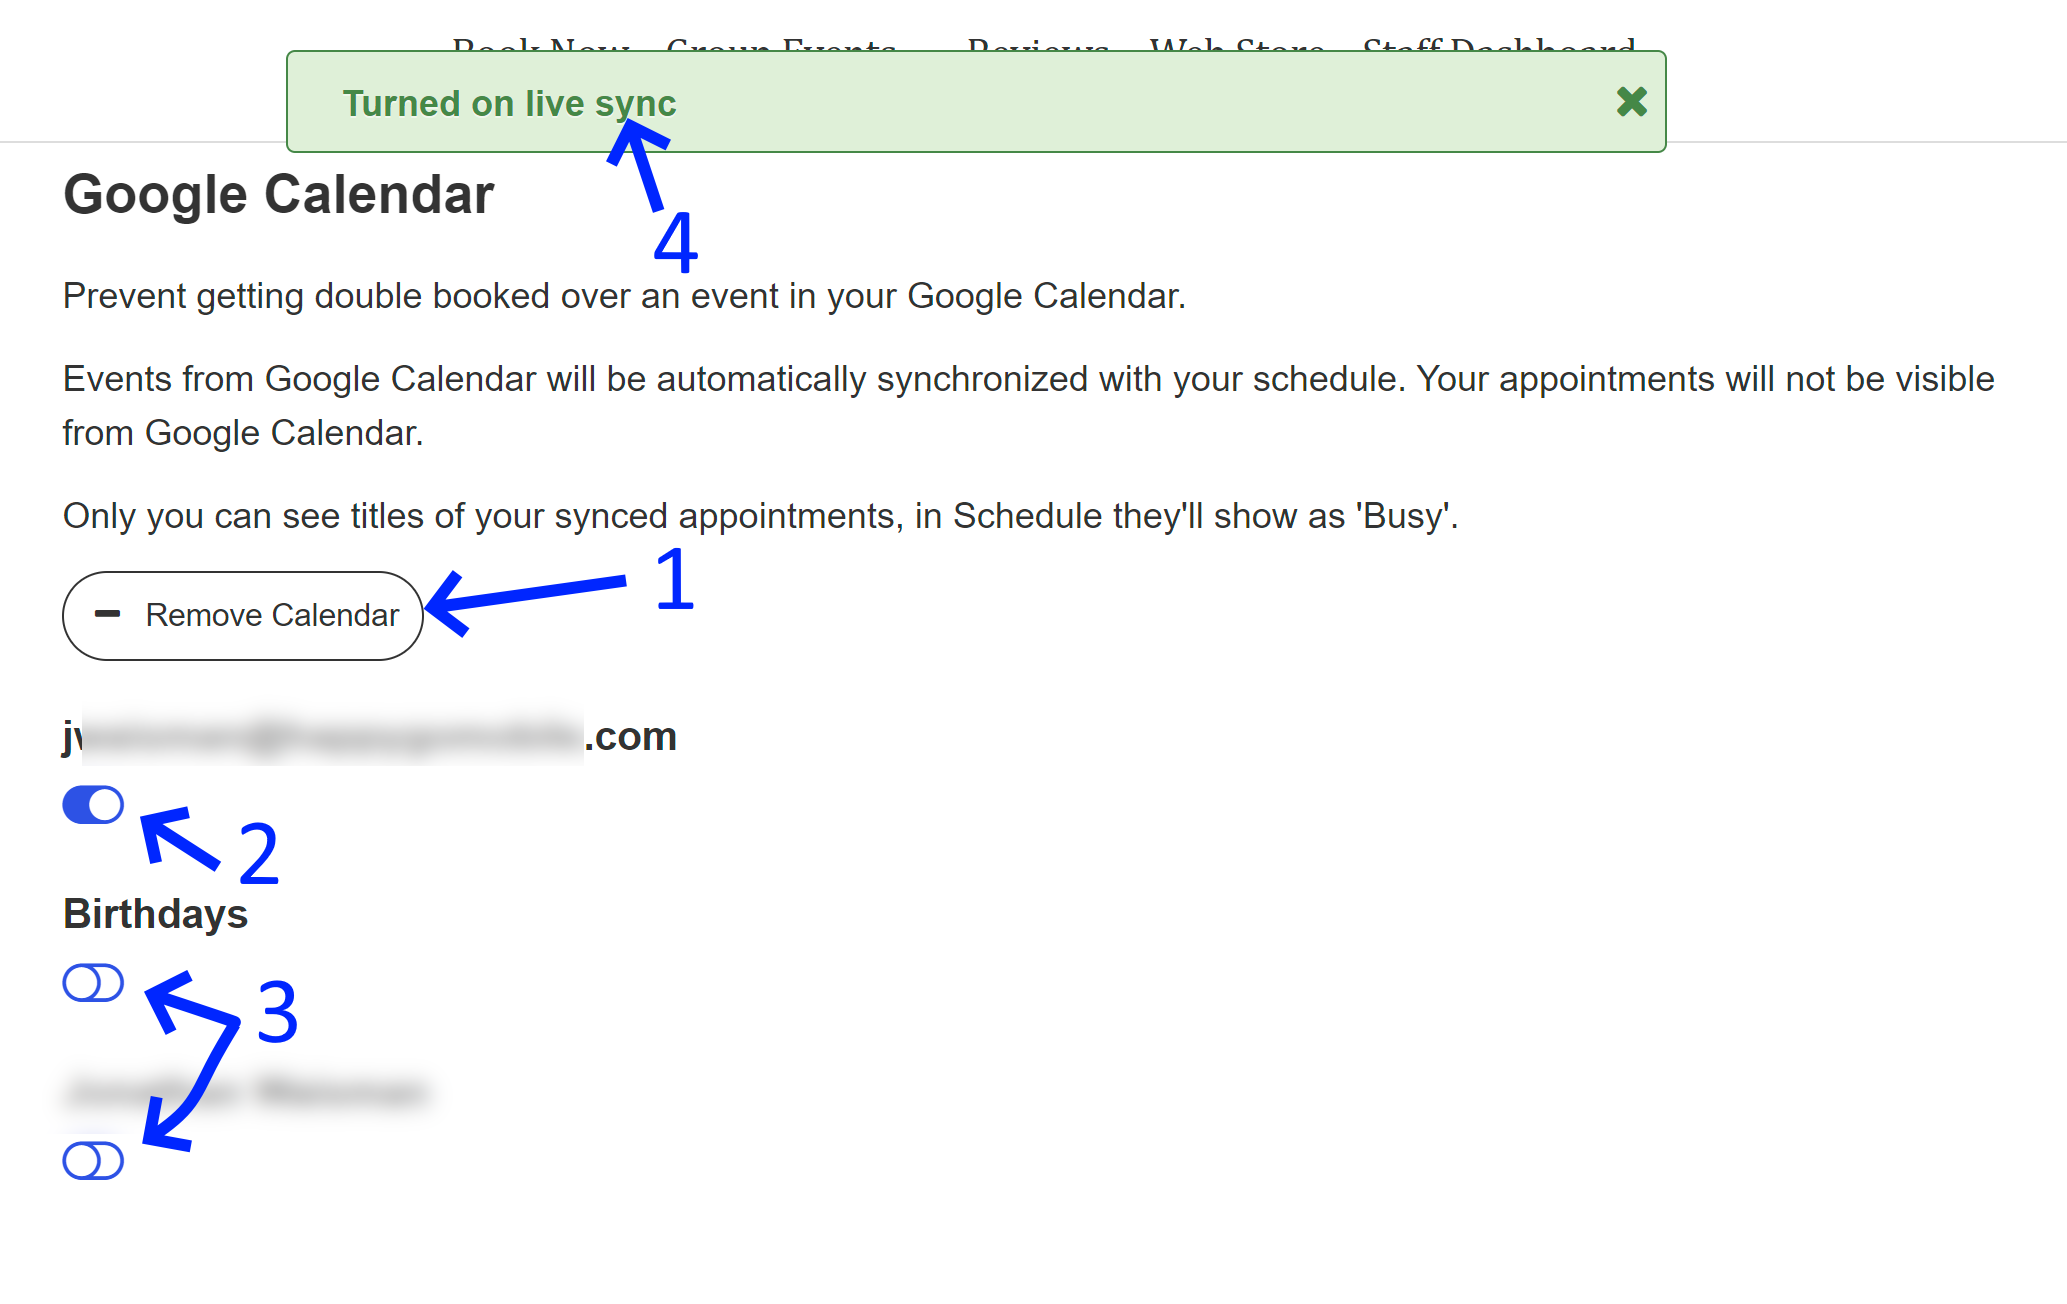
Once you have accepted the standard terms for your specific Gmail account, which includes a personal calendar, you have various options to manage the content that is considered or excluded. Here are a few ways to customize your management preferences:
-
At any time, you can remove the calendar integration if needed.
-
Select specific subcategories from your calendar that you want the system to consider.
-
Choose the subcategories that you do not want the system to consider. For instance, you can exclude birthdays that you have marked just as reminders and not as events that should block your day.
-
Upon completing the integration process and selecting the relevant calendar subcategories, a message will pop up confirming that the staff availability is now synchronized with the respective calendar(s) mentioned in step 2.
Please note that these customization options allow you to tailor the calendar integration according to your preferences and specific scheduling availability needs.