Once you have defined your products, variants, and familiarized yourself with retail and inventory management features, dive deeper to discover how to effectively sell your products online.
By incorporating the eCommerce widget into your website, you can streamline the add-to-cart process and provide a seamless experience for your clients. Let's proceed with the guide to make your website an efficient platform for managing a web store.
Here's an example of an eCommerce widget on your website:

Before diving into the process of adding the eCommerce widget to your website, there are a few prerequisites you need to fulfill. Ensure that you are logged in as the manager of the business and have already created at least one product.
Once you have completed these initial steps, follow the instructions below to incorporate the eCommerce widget and provide an enhanced user experience for your website visitors:

-
Create/Edit a Page: Start by creating a new page or editing an existing one on your *website*. This will serve as the canvas for adding various elements and widgets.
- Insert an element / widget
- Select "Services" under Widgets, the widget which can be tailored to your specific requirements, in this case to only list products (more on this below)
- Drag the object into your page for further configuration.

-
Left-click on the New Widget: Begin by left-clicking on the newly added widget on your page. This action will enable you to access its settings and make necessary adjustments.
-
Access the Configuration Options: Locate the gear icon within the corresponding editor window and click on it. This will open up a configuration menu where you can fine-tune various aspects of the widget to align with your preferences and requirements.

When configuring the widget, you have multiple options to determine how products are presented, organized by category. Tailor the display to your preferences using the following choices:
-
"Show Image": If you included images while creating your categories, the widget will showcase them when products belonging to those categories are displayed. This visual element adds an engaging touch to the widget.
-
"Show Name": Prior to listing the products available for purchase, the widget can display the name of the category to provide context and aid in navigation. This allows visitors to quickly identify the products they are interested in. For example, category "Grooming" followed by the actual variants of products like "Shampoo 500 mL", "Shampoo 1 L", "Shampoo 1.5 L", etc.
-
"Description": If you provided descriptions for your categories during the setup process, the widget can also include them. This additional information enhances the user experience by offering brief insights or details about each category.
-
"Select Category": By selecting specific categories in the checklist, you have control over which categories are displayed on the widget within your website page. This allows you to tailor the widget's content and visibility to suit your business needs.
Both your products and services are defined within each category. Further configuration is required to select only the products to show:
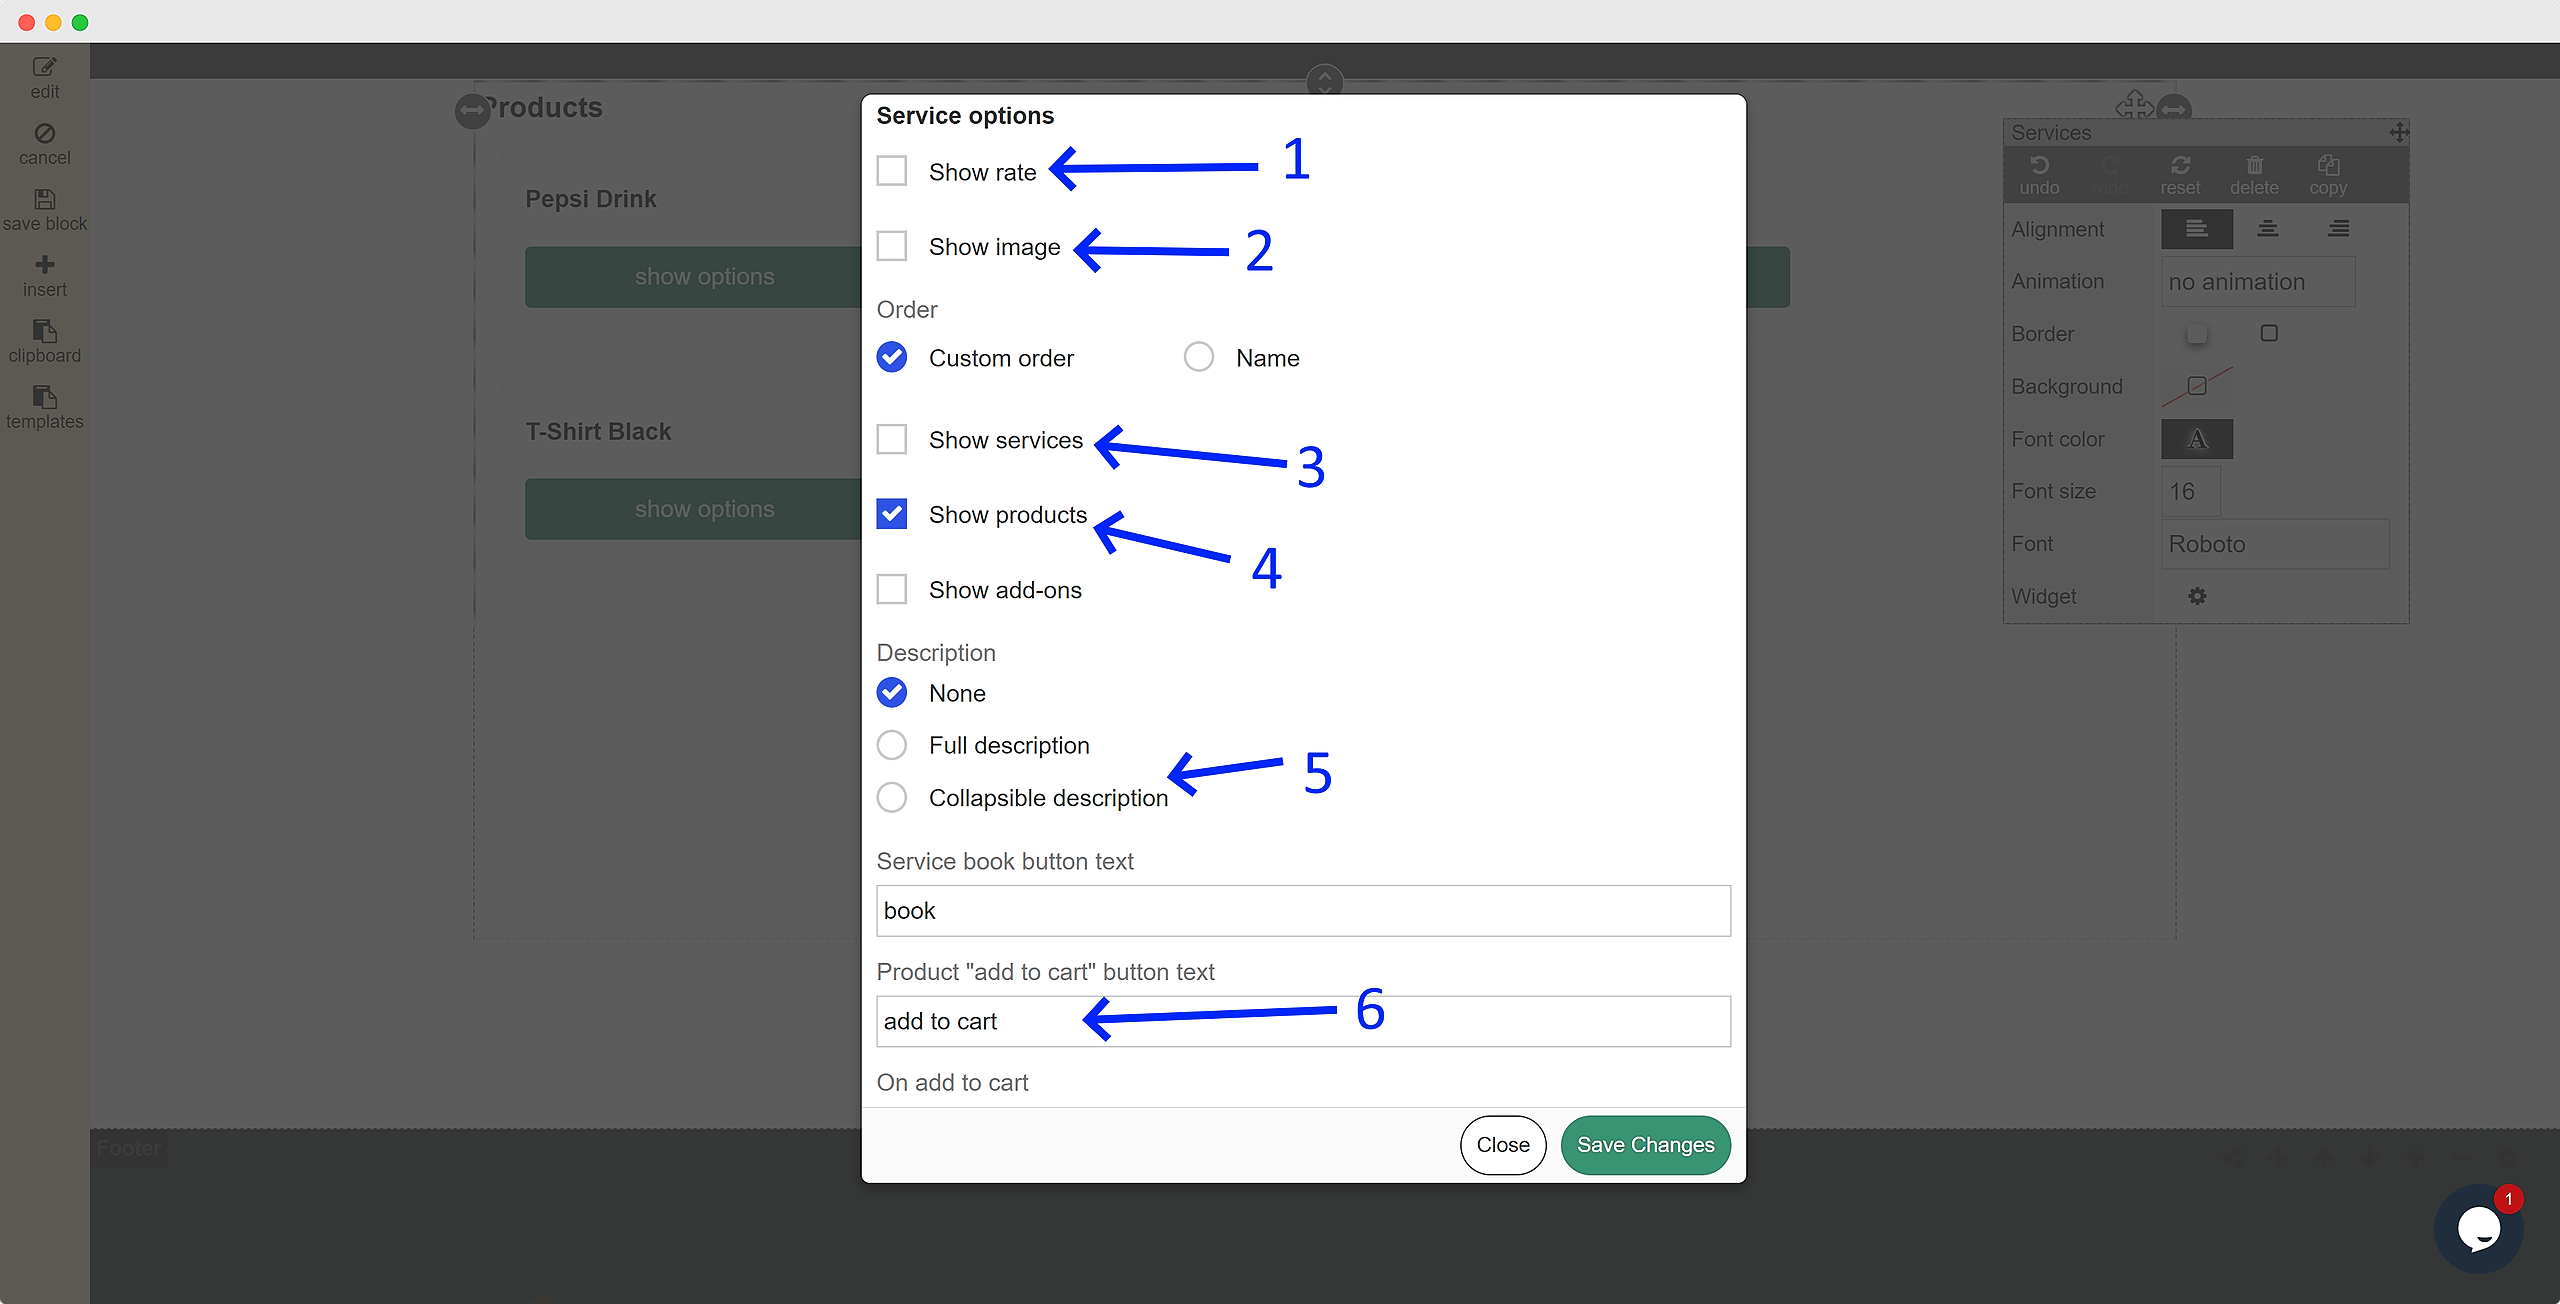
After configuring the category display settings, you need to further personalize the appearance and functionality of the products listed within each category. Explore the following options:
-
Show Rate: The system can display the price associated with each product. This information is positioned after the product title and before the add-to-cart button, providing clarity on pricing. Products have variants, and the pricing does vary based on which variant is selected. For example, a T-shirt XL versus a T-shirt Small.
-
Show Image: Similar to the category display setting, you can choose to include an image for each individual product. This visual representation adds an appealing element to the widget, giving visitors a glimpse of what to expect.
- Show Services: Turn this off, so that bookable services defined in the same parent category aren't displayed.
-
Show Products: Pet owners will see an "add to cart" button to purchase the products that belong to the categories selected earlier.
-
Description: If you provided descriptions for your products during the product setup, the widget can include them. This feature provides valuable insights or details about each product. You can choose between two options for displaying the description: a standard display or a collapsible description. The latter is recommended for lengthier descriptions and includes a "learn more" link that expands the description when clicked by the pet owner client.
- Product Purchase Button Text: If your category contains products, customize the text displayed on the purchase button. The default is "add to cart," but you can modify it to fit your preferences. Popular alternatives include "buy," "purchase," and similar phrases.
-
On Add To Cart: Define the behavior when a client adds a product to their cart. Choose from three options:
- "Checkout" or "Prompt": When selected, the pet owner client will be redirected to their cart for finalizing the purchase.
- "Continue Shopping": If this option is chosen, the product will be added to the cart, but the pet owner client can continue browsing without being immediately redirected. They can access the cart at their convenience.
* Your subscription to Easy Busy Pets includes free hosting for full domain support. If you choose to host your website externally, you will need to redirect from that site to a subdomain with Easy Busy Pets for actionable features like online booking.